Category: Homelab

Homelab is the category on orthogonal.info dedicated to building, operating, and securing home server infrastructure. From NAS configuration and network segmentation to Docker-based self-hosting and power management, this collection documents the real decisions and trade-offs involved in running production-grade services at home. If you believe your home network deserves the same engineering rigor as a cloud deployment, you are in the right place.

With 16 hands-on posts, Homelab captures lessons learned from building and maintaining a serious home infrastructure — complete with the mistakes, workarounds, and victories that vendor documentation never mentions.

Key Topics Covered

TrueNAS and network-attached storage — Setting up TrueNAS SCALE and TrueNAS CORE, ZFS pool design, snapshot and replication strategies, and SMB/NFS share configuration for mixed-OS environments.
Self-hosting services — Deploying and maintaining services like Nextcloud, Immich, Jellyfin, Home Assistant, Vaultwarden, and Pi-hole with Docker Compose on home servers.
Network segmentation and firewalls — Designing VLAN architectures with OPNsense or pfSense, isolating IoT devices, configuring WireGuard for secure remote access, and implementing DNS-based ad blocking.
Hardware selection and builds — Choosing server hardware, evaluating mini PCs vs. rack-mount servers, NIC and HBA selection, and balancing performance with power consumption and noise levels.
UPS and power management — Configuring NUT (Network UPS Tools) for graceful shutdowns, monitoring battery health, and designing power-resilient home infrastructure.
Backup and disaster recovery — Implementing 3-2-1 backup strategies with ZFS replication, restic, Borg, and off-site cloud targets, plus documented recovery procedures.
Monitoring and automation — Running Uptime Kuma, Grafana, and Prometheus at home, plus scripting automated maintenance tasks with cron, systemd timers, and Ansible.

Who This Content Is For
This category is for homelab enthusiasts, self-hosting advocates, system administrators who tinker at home, and privacy-conscious engineers who want to own their data and services. Whether you are starting with a single Raspberry Pi or running a multi-node server rack, the guides scale to your ambition. The content assumes basic Linux familiarity and a willingness to learn by doing — no enterprise budget required.

What You Will Learn
By exploring the Homelab category, you will learn how to plan, build, and maintain home infrastructure that is reliable, secure, and genuinely useful. You will understand how to design storage pools that protect your data, segment your network to contain IoT risks, deploy self-hosted services that rival their cloud counterparts, and monitor everything with open-source tools. Each guide shares real configurations, hardware recommendations based on actual use, and honest assessments of what works and what does not.

Check out the posts below to start building your ideal homelab.

  • Optimize Plex on TrueNAS Scale: Tips & Techniques

    Optimize Plex on TrueNAS Scale: Tips & Techniques

    TL;DR: TrueNAS Scale is a powerful platform for running Plex, but optimizing performance requires careful resource allocation, advanced configuration, and proactive troubleshooting. This guide covers everything from setting up secure permissions to fine-tuning your Plex server for smooth playback, even under heavy load.

    Quick Answer: Use TrueNAS Scale’s containerized apps feature to deploy Plex securely, allocate sufficient resources, and monitor performance metrics to ensure a smooth media streaming experience.

    Introduction

    “Most Plex setups on TrueNAS Scale are under-optimized and insecure.” That’s a bold claim, but it’s one I stand by. After years of working with enterprise-grade systems and scaling down those practices for homelabs, I’ve seen too many Plex servers suffer from poor performance, misconfigured permissions, and outright security risks. If you’re running Plex on TrueNAS Scale, you’re already ahead of the curve—but are you doing it right?

    TrueNAS Scale is a NAS operating system built on Debian Linux, offering advanced features like ZFS, Kubernetes, and containerized apps. Plex, a popular media server, can be deployed on TrueNAS Scale to serve your media files to various devices. However, the default setup often leaves performance and security on the table.

    In this guide, I’ll walk you through advanced techniques to optimize Plex on TrueNAS Scale. We’ll cover resource allocation, advanced configuration options, troubleshooting common issues, and even compare TrueNAS Scale to other NAS solutions. And because security is non-negotiable, I’ll highlight best practices to keep your media server locked down.

    💡 Pro Tip: Before starting, ensure your TrueNAS Scale system is fully updated. New updates often include performance improvements and security patches that can benefit your Plex setup.

    Whether you’re a seasoned homelab enthusiast or a beginner looking to get the most out of your Plex server, this guide will provide actionable insights. Let’s dive in and transform your Plex setup into a high-performing, secure media powerhouse.

    Understanding Plex Resource Allocation on TrueNAS Scale

    TrueNAS Scale is built on Debian Linux and uses Kubernetes under the hood to manage applications. Plex, when deployed as a containerized app, relies heavily on CPU, memory, and disk I/O. Mismanaging these resources can lead to buffering, slow library scans, and even server crashes.

    Here’s what you need to know about resource allocation:

    • CPU: Plex is CPU-intensive, especially for transcoding. If you’re streaming to multiple devices or using high-bitrate media, you’ll need a powerful processor.
    • Memory: Plex uses RAM for caching metadata and thumbnails. Insufficient memory can slow down library navigation and cause playback issues.
    • Disk I/O: Media streaming and library scans generate significant disk activity. Using SSDs for your metadata storage can dramatically improve performance.

    To allocate resources effectively, you can use TrueNAS Scale’s container settings to define CPU and memory limits for Plex. This ensures Plex doesn’t monopolize system resources, leaving room for other applications and services.

    # Example of setting resource limits for Plex container
    kubectl set resources deployment plex-container --limits=cpu=2,memory=4Gi
    

    Additionally, monitor resource usage using TrueNAS Scale’s built-in reporting tools. These tools provide insights into CPU, memory, and disk usage, helping you identify bottlenecks.

    💡 Pro Tip: If you’re running multiple containers on TrueNAS Scale, consider using resource quotas to prevent Plex from starving other services of CPU or memory.

    Real-world scenarios often involve multiple users streaming simultaneously. For example, if you have a family of five, each watching different 1080p streams, your CPU and memory usage will spike significantly. Planning for these peak loads is critical to avoid interruptions.

    Troubleshooting Resource Allocation Issues

    If Plex is consuming excessive resources, check the following:

    • Ensure hardware transcoding is enabled to offload CPU usage to your GPU.
    • Verify that your Plex container isn’t scanning the library excessively. Scheduled scans can help mitigate this.
    • Upgrade your hardware if resource limits are consistently exceeded.

    For edge cases, such as running Plex alongside other resource-intensive applications like Nextcloud or a game server, you may need to fine-tune resource limits further. Use Kubernetes namespaces to isolate workloads and avoid conflicts.

    Advanced Configuration for Plex on TrueNAS Scale

    Once you’ve deployed Plex on TrueNAS Scale, the default configuration might work—but it’s far from optimal. Let’s dive into some advanced settings to enhance performance and security.

    1. Using Hardware Transcoding

    If your server has a GPU, you can enable hardware transcoding to offload video processing from the CPU. This is especially useful for 4K content or multiple simultaneous streams. Plex supports hardware transcoding for Intel Quick Sync, NVIDIA GPUs, and AMD GPUs.

    # Enable hardware transcoding in Plex
    docker exec -it plex-container bash
    echo "HW Transcoding enabled" > /etc/plex/hw_transcode.conf
    exit
    

    Ensure your GPU drivers are properly installed and updated. For NVIDIA GPUs, you may need to install the NVIDIA Docker runtime. This can be done using the following commands:

    # Install NVIDIA Docker runtime
    distribution=$(. /etc/os-release;echo $ID$VERSION_ID)
    curl -s -L https://nvidia.github.io/nvidia-docker/gpgkey | sudo apt-key add -
    curl -s -L https://nvidia.github.io/nvidia-docker/$distribution/nvidia-docker.list | sudo tee /etc/apt/sources.list.d/nvidia-docker.list
    sudo apt-get update && sudo apt-get install -y nvidia-container-toolkit
    sudo systemctl restart docker
    
    ⚠️ Security Note: Avoid exposing your Plex container to the internet without proper firewall rules and HTTPS enabled.

    2. Optimizing Storage Configuration

    Store your Plex metadata on an SSD for faster access. Use TrueNAS Scale’s ZFS capabilities to create a dedicated dataset for Plex metadata and media files. ZFS compression can also reduce storage requirements for metadata.

    # Create a dataset for Plex metadata
    zfs create tank/plex_metadata
    zfs set compression=lz4 tank/plex_metadata
    

    Organize your media files into separate datasets based on type (e.g., movies, TV shows, music). This improves Plex’s ability to scan and index your library efficiently.

    💡 Pro Tip: Use ZFS snapshots to back up your Plex metadata. This allows you to roll back changes if something goes wrong during an update.

    3. Securing Your Plex Server

    Security is critical for any server exposed to the internet. Use a reverse proxy like Traefik or Nginx to manage HTTPS and enforce access controls. Additionally, configure Plex to require authentication for all users.

    # Example Nginx reverse proxy configuration
    server {
        listen 443 ssl;
        server_name plex.example.com;
    
        location / {
            proxy_pass http://localhost:32400;
            proxy_set_header Host $host;
            proxy_set_header X-Real-IP $remote_addr;
        }
    }
    

    For added security, consider using a VPN to access your Plex server remotely. This eliminates the need to expose it directly to the internet.

    Troubleshooting Common Plex Issues on TrueNAS Scale

    Even with the best setup, things can go wrong. Here are some common Plex issues and how to fix them:

    1. Buffering During Playback

    Buffering is often caused by insufficient CPU or network bandwidth. Check your Plex logs for transcoding errors and ensure your network supports the required bitrate.

    # Check Plex logs for errors
    docker logs plex-container | grep "transcode"
    

    Upgrade your network hardware if bandwidth is a bottleneck. Use wired connections wherever possible for streaming devices.

    2. Library Scans Taking Forever

    Slow library scans are usually due to high disk I/O or large metadata files. Move your metadata to an SSD and enable scheduled scans during off-peak hours.

    3. Plex Not Starting

    If Plex fails to start, it’s often due to corrupted metadata or misconfigured permissions. Check your container logs and ensure the Plex user has access to the media directories.

    Comparing TrueNAS Scale with Other NAS Solutions for Plex

    TrueNAS Scale isn’t the only NAS solution for Plex, but it does have unique advantages:

    • TrueNAS Core: Great for traditional NAS use cases but lacks containerized app support.
    • Unraid: Popular for Plex but doesn’t offer the same level of ZFS support.
    • Synology: User-friendly but limited in hardware scalability and customization.

    For homelab enthusiasts who want enterprise-grade features, TrueNAS Scale is hard to beat.

    Best Practices for Long-Term Plex Management on TrueNAS Scale

    Running Plex on TrueNAS Scale is a long-term commitment. Here are some best practices to keep your server running smoothly:

    • Regularly update Plex and TrueNAS Scale to patch vulnerabilities.
    • Monitor resource usage with TrueNAS Scale’s built-in tools.
    • Use VLANs to isolate your Plex server from other devices on your network.
    • Backup your Plex metadata and media files to a separate storage device.

    Frequently Asked Questions

    1. Can I run other apps alongside Plex on TrueNAS Scale?

    Yes, but ensure you allocate sufficient resources to each app to avoid contention.

    2. Is TrueNAS Scale overkill for a Plex server?

    Not at all. TrueNAS Scale’s ZFS and Kubernetes features make it ideal for advanced homelabs.

    3. How do I secure my Plex server?

    Use a reverse proxy like Traefik or Nginx, enable HTTPS, and avoid exposing Plex directly to the internet.

    4. What hardware is best for Plex on TrueNAS Scale?

    A multi-core CPU, at least 16GB of RAM, and SSDs for metadata storage are recommended.

    🛠️ Recommended Resources:

    Tools and books mentioned in (or relevant to) this article:

    Conclusion

    Optimizing Plex on TrueNAS Scale requires a mix of resource management, advanced configuration, and proactive troubleshooting. By following the techniques outlined in this guide, you can ensure smooth playback, secure your server, and make the most of TrueNAS Scale’s powerful features.

    Here’s what to remember:

    • Allocate sufficient CPU, memory, and disk resources to Plex.
    • Enable hardware transcoding for better performance.
    • Store metadata on SSDs and use ZFS snapshots for backups.
    • Regularly monitor and update your Plex server.

    Have a tip or question about running Plex on TrueNAS Scale? Drop a comment or reach out on Twitter—I’d love to hear from you.

    References

    📋 Disclosure: Some links in this article are affiliate links. If you purchase through these links, I earn a small commission at no extra cost to you. I only recommend products I’ve personally used or thoroughly evaluated. This helps support orthogonal.info and keeps the content free.

  • Secure Self-Hosted LLM: Enterprise Practices at Home

    Secure Self-Hosted LLM: Enterprise Practices at Home

    TL;DR: Self-hosting large language models (LLMs) offers privacy and control but comes with security challenges. By scaling down enterprise-grade practices like zero trust, RBAC, and encryption, you can secure your homelab deployment. This guide covers setup, monitoring, and future-proofing your self-hosted LLM environment.

    Quick Answer: To securely self-host LLMs, implement zero-trust principles, encrypt sensitive data, and monitor usage. Use tools like OPNsense for network segmentation and ensure regular updates to your LLM software.

    Introduction to Self-Hosted LLMs

    Open-weight large language models like LLaMA 3, Mistral, and Phi-3 have made self-hosting practical for the first time. What once required a data center can now run on a single desktop GPU with 16 GB of VRAM. While most users rely on cloud-based APIs like OpenAI or Hugging Face, self-hosting LLMs is gaining traction among privacy-conscious individuals and organizations.

    Self-hosting LLMs allows you to maintain full control over your data, avoid vendor lock-in, and customize the model to your specific needs. For example, a small business might use a self-hosted LLM to analyze internal documents without risking sensitive information being sent to third-party servers. Similarly, a privacy-conscious individual might prefer self-hosting to avoid the data collection practices of commercial providers.

    However, with great power comes great responsibility—hosting an LLM in your homelab introduces unique security challenges. These models are resource-intensive, require careful configuration, and can become a significant attack vector if not properly secured. For instance, an improperly secured API endpoint could allow unauthorized users to access your model, potentially exposing sensitive data or consuming your resources.

    In addition to security concerns, self-hosting LLMs requires a deep understanding of the underlying infrastructure. Unlike cloud-based solutions, where the provider handles scaling, updates, and backups, self-hosting places the onus on you to manage these aspects. This means you’ll need to plan for hardware requirements, software dependencies, and regular maintenance to ensure smooth operation.

    In this guide, we’ll explore how to adapt enterprise-grade security practices to protect your self-hosted LLM environment without over-engineering. Whether you’re running a homelab for personal projects or small-scale business needs, these strategies will help you deploy LLMs securely and efficiently. By the end, you’ll have a resilient framework for balancing functionality, performance, and security in your self-hosted LLM setup.

    Scaling Down Enterprise Security Practices

    Enterprise environments have long relied on resilient security frameworks like zero trust, role-based access control (RBAC), and encryption to protect sensitive systems. These practices are designed to safeguard large-scale, complex infrastructures but can be adapted to smaller-scale environments like homelabs. When scaled down appropriately, they provide a strong foundation for securing your LLM deployment.

    For example, while a large enterprise might deploy a full zero-trust architecture with multiple layers of identity verification, a homelab can achieve similar results by implementing basic network segmentation and enforcing strong authentication for all users. The key is to focus on simplicity and practicality, ensuring that security measures do not become overly burdensome or counterproductive.

    Scaling down enterprise practices also means prioritizing the most critical elements. For instance, while a corporate environment might use advanced intrusion detection systems (IDS) with machine learning capabilities, a homelab could rely on simpler tools like fail2ban to block suspicious login attempts. By focusing on the essentials, you can achieve a high level of security without the complexity of enterprise-grade solutions.

    Another example of scaling down is in the use of logging and monitoring tools. While enterprises might deploy centralized logging solutions like Splunk, a homelab can use lightweight alternatives such as Fluentd or even simple log rotation scripts. The goal is to strike a balance between security and resource efficiency, ensuring that your setup remains manageable.

    Finally, remember that scaling down doesn’t mean compromising on security. It’s about tailoring enterprise practices to fit the scope and scale of your homelab. By focusing on the core principles of zero trust, RBAC, and encryption, you can create a secure environment that meets your needs without unnecessary complexity.

    Adapting Zero-Trust Principles

    Zero trust operates on the principle of “never trust, always verify.” In a homelab setting, this means ensuring that every device, user, and application must authenticate and be authorized before accessing resources. For your LLM deployment, this could involve:

    • Requiring API keys or tokens for accessing the model.
    • Segmenting your network to isolate the LLM from less secure devices.
    • Using mutual TLS (mTLS) for encrypted communication between services.

    For example, you might configure your LLM server to only accept requests from specific IP addresses within your network. Additionally, you could use a reverse proxy like NGINX to enforce authentication and encryption for all incoming requests.

    server {
        listen 443 ssl;
        server_name llm.example.com;
    
        ssl_certificate /etc/ssl/certs/llm.crt;
        ssl_certificate_key /etc/ssl/private/llm.key;
    
        location / {
            proxy_pass http://127.0.0.1:5000;
            proxy_set_header Host $host;
            proxy_set_header X-Real-IP $remote_addr;
            auth_basic "Restricted Access";
            auth_basic_user_file /etc/nginx/.htpasswd;
        }
    }
    ⚠️ Security Note: Avoid using default credentials or hardcoding API keys. Use a secrets management tool like HashiCorp Vault to securely store and retrieve sensitive information.

    Another practical implementation of zero trust is to use a VPN to restrict access to your homelab. Tools like WireGuard or OpenVPN can create a secure tunnel for remote access, ensuring that only authenticated users can interact with your LLM deployment.

    Implementing Role-Based Access Control (RBAC)

    RBAC ensures that users and applications only have access to the resources they need. For example, you might want to allow read-only access to certain users while restricting administrative privileges to yourself. Tools like Keycloak or Auth0 can help you implement RBAC for your self-hosted LLM.

    In a homelab environment, you can use lightweight solutions like Linux user groups or Docker container permissions to enforce RBAC. For instance, you could create a “read-only” group that only has access to specific API endpoints, while an “admin” group has full control over the system.

    # Example RBAC policy for a self-hosted LLM
    apiVersion: rbac.authorization.k8s.io/v1
    kind: Role
    metadata:
      namespace: llm
      name: llm-read-only
    rules:
    - apiGroups: [""]
      resources: ["llm-endpoints"]
      verbs: ["get", "list"]
    
    💡 Pro Tip: Regularly audit your RBAC policies to ensure that permissions are aligned with current needs. Remove unused roles and privileges to minimize attack surfaces.

    For a simpler setup, you can use environment variables to define roles and permissions. For example, a Python-based LLM server could check user roles before processing requests:

    import os
    from flask import Flask, request, jsonify
    
    app = Flask(__name__)
    
    @app.route('/api', methods=['POST'])
    def api():
        user_role = request.headers.get('X-User-Role')
        if user_role != 'admin':
            return jsonify({"error": "Unauthorized"}), 403
        return jsonify({"message": "Request successful"})
    
    if __name__ == "__main__":
        app.run()

    Setting Up a Secure Environment

    Choosing Hardware and Software

    Self-hosting LLMs requires a balance between performance and cost. For hardware, consider using a server-grade machine with a powerful GPU like an NVIDIA A100 or RTX 3090. For software, popular frameworks like PyTorch and TensorFlow support a wide range of LLMs, including open-source options like GPT-NeoX and BLOOM.

    When selecting an operating system, prioritize security-focused distributions like Ubuntu Server or Fedora CoreOS. These provide minimal attack surfaces and regular security updates. Additionally, consider using containerization platforms like Docker or Kubernetes to isolate your LLM deployment from the host system.

    For example, you could use Docker to create a containerized environment for your LLM. This not only simplifies deployment but also enhances security by isolating the application from the underlying system:

    # Dockerfile for a self-hosted LLM
    FROM python:3.9-slim
    
    WORKDIR /app
    COPY requirements.txt .
    RUN pip install -r requirements.txt
    COPY . .
    
    CMD ["python", "app.py"]
    🛠️ Recommended Resources:

    Tools and books mentioned in (or relevant to) this article:

    Frequently Asked Questions

    What are the benefits of self-hosting a large language model (LLM)?

    Self-hosting an LLM provides full control over your data, avoids vendor lock-in, and allows for customization to meet specific needs. For example, businesses can analyze internal documents securely, and privacy-conscious individuals can avoid data collection practices of commercial providers.

    What are the main security challenges of self-hosting an LLM?

    Self-hosting LLMs introduces risks such as improperly secured API endpoints, which could allow unauthorized access, expose sensitive data, or consume resources. Additionally, these models are resource-intensive and require careful configuration and monitoring to prevent vulnerabilities.

    How can I secure my self-hosted LLM deployment?

    To secure your LLM, implement enterprise-grade practices scaled down for homelabs, such as zero-trust principles, role-based access control (RBAC), and encryption. Use tools like OPNsense for network segmentation, monitor usage, and ensure regular updates to your LLM software.

    Why is monitoring important for a self-hosted LLM?

    Monitoring is critical to detect unauthorized access, resource misuse, and potential vulnerabilities in your LLM deployment. It helps ensure the system remains secure and performs optimally, minimizing risks associated with hosting sensitive AI technology.

    📋 Disclosure: Some links in this article are affiliate links. If you purchase through these links, I earn a small commission at no extra cost to you. I only recommend products I’ve personally used or thoroughly evaluated. This helps support orthogonal.info and keeps the content free.

    References

  • Network Segmentation for a Secure Homelab

    Network Segmentation for a Secure Homelab

    TL;DR: Network segmentation is a critical security practice that isolates devices and services into distinct zones to reduce attack surfaces and improve control. In this article, we’ll explore how to adapt enterprise-grade segmentation techniques for homelabs, covering VLANs, subnets, and tools like pfSense and Ubiquiti. By the end, you’ll have a blueprint for a secure, scalable, and efficient home network.

    Quick Answer: Network segmentation involves dividing your network into isolated segments to improve security, performance, and manageability. For homelabs, tools like VLANs, pfSense, and managed switches make this achievable without breaking the bank.

    Introduction to Network Segmentation

    “Just put everything on the same Wi-Fi network.” That’s the advice most people follow when setting up their home networks. It’s simple, it works, and it’s a disaster waiting to happen. Why? Because a flat network is a hacker’s paradise. Once an attacker gains access to one device, they can move laterally to compromise everything else.

    Network segmentation is the practice of dividing a network into smaller, isolated segments. Each segment operates as a distinct zone, with strict controls over what traffic can flow between them. This approach is foundational in enterprise environments, where security and performance are non-negotiable. But here’s the kicker: it’s just as critical for homelabs.

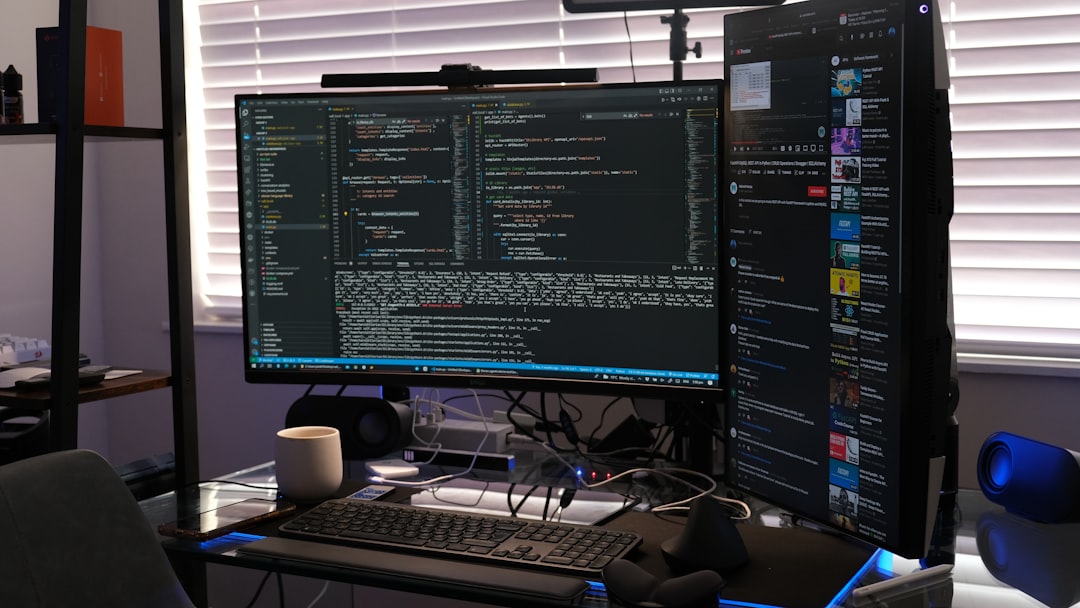
    If you’re running a homelab with IoT devices, media servers, workstations, and maybe even a Kubernetes cluster, you’re already managing a mini-enterprise. And just like in the enterprise world, segmentation can help you mitigate risks, improve performance, and maintain control over your network.

    Segmentation isn’t just about security—it’s also about organization. Imagine trying to troubleshoot a network issue when every device is lumped into the same subnet. By separating devices into logical groups, you make it easier to pinpoint problems, enforce policies, and scale your network as your homelab grows.

    Real-world examples abound. Consider a scenario where your smart thermostat is compromised due to a vulnerability. Without segmentation, an attacker could use it as a launchpad to access your work laptop or media server. With segmentation, the thermostat is isolated in its own VLAN, limiting the scope of the attack.

    Another example is bandwidth management. If your media server is streaming 4K content, it could hog network resources and impact your work devices. Segmentation allows you to prioritize traffic and ensure critical devices always have the bandwidth they need.

    💡 Pro Tip: Start small. Even segmenting your IoT devices into their own VLAN can dramatically improve your network security.

    When implementing segmentation, ensure you understand the devices on your network and their communication needs. Over-segmenting can lead to unnecessary complexity, while under-segmenting leaves your network vulnerable.

    Enterprise Practices: Scaling Down for Home Use

    In enterprise networks, segmentation is often implemented using VLANs (Virtual Local Area Networks), firewalls, and access control lists (ACLs). The goal is to isolate sensitive systems, limit the spread of malware, and enforce the principle of least privilege. For example, a finance department’s network might be isolated from the marketing team’s network, with strict rules governing how they can communicate.

    Adapting these practices for a homelab might seem overkill, but it’s not. The same principles apply, just on a smaller scale. Instead of isolating departments, you’ll isolate device types: IoT gadgets, media servers, work devices, and lab environments. Why? Because your smart fridge shouldn’t have the same level of access as your work laptop.

    Fortunately, the tools to achieve this are more accessible than ever. Managed switches, routers with VLAN support, and open-source firewall solutions like pfSense and OPNsense make enterprise-grade segmentation feasible for home networks. The challenge lies in understanding how to design and implement a segmented network without overcomplicating things.

    For example, let’s say you’re using a Ubiquiti EdgeRouter. You can create VLANs to isolate traffic and use firewall rules to control communication between segments. This setup mirrors enterprise-grade practices but is scaled down for home use. Here’s a simple configuration example:

    # Ubiquiti EdgeRouter VLAN Configuration
    configure
    set interfaces ethernet eth1 vif 10 description "IoT VLAN"
    set interfaces ethernet eth1 vif 20 description "Media VLAN"
    set service dhcp-server shared-network-name IoT subnet 192.168.10.0/24
    set service dhcp-server shared-network-name Media subnet 192.168.20.0/24
    commit
    save

    By using VLANs and DHCP servers, you can assign IP ranges to specific device groups, ensuring logical separation and easier management.

    💡 Pro Tip: When configuring VLANs, ensure your DHCP server is correctly set up to assign IPs within the correct subnet. Misconfigurations can lead to devices failing to connect.

    Another useful approach is applying ACLs to enforce granular control over traffic. For example, you can block IoT devices from initiating outbound connections while allowing inbound connections from your media server.

    When scaling down enterprise practices, focus on simplicity. Use tools and configurations that align with your technical expertise and avoid overengineering your setup.

    Designing a Segmented Network for Your Homelab

    Before diving into tools and configurations, let’s start with a high-level design. The first step is identifying the key devices and services in your homelab. Common categories include:

    • IoT Devices: Smart thermostats, cameras, and other gadgets that are often poorly secured.
    • Media Servers: Devices like Plex or Jellyfin that handle large amounts of traffic.
    • Work Devices: Laptops, desktops, and other devices used for professional tasks.
    • Lab Environments: Virtual machines, Kubernetes clusters, or other experimental setups.

    Once you’ve categorized your devices, you can start designing your network. The most common approach is to use VLANs and subnets for logical separation. For example:

    # Example VLAN and Subnet Design
    VLAN 10: IoT Devices (192.168.10.0/24)
    VLAN 20: Media Servers (192.168.20.0/24)
    VLAN 30: Work Devices (192.168.30.0/24)
    VLAN 40: Lab Environment (192.168.40.0/24)

    In this setup, each VLAN represents a separate network segment. Devices in one VLAN cannot communicate with devices in another unless explicitly allowed. This isolation dramatically reduces the risk of lateral movement during an attack.

    When designing your network, consider traffic flow. For example, your media server may need access to your work devices for streaming, but it shouldn’t have access to your IoT devices. Use firewall rules to enforce these policies.

    ⚠️ Common Pitfall: Avoid overly complex segmentation. Too many VLANs can make management difficult and increase the risk of misconfigurations.

    Another consideration is scalability. As your homelab grows, you may need to add new VLANs or adjust existing ones. Plan for future expansion by leaving room in your IP address ranges and ensuring your hardware can handle additional segments.

    Implementing Network Segmentation: Tools and Tips

    Now that you have a design, let’s talk about implementation. The tools you’ll need depend on your existing hardware and budget. Here’s a breakdown:

    Hardware Requirements

    • Router: Look for models that support VLANs and advanced firewall rules. Popular choices include Ubiquiti EdgeRouter, MikroTik, and pfSense appliances.
    • Managed Switch: A managed switch is essential for VLAN tagging. TP-Link, Netgear, and Cisco offer affordable options.
    • Access Points: If you’re using Wi-Fi, ensure your access points support multiple SSIDs mapped to VLANs.

    Software Options

    For managing your network, open-source tools like pfSense and OPNsense are excellent choices. They offer reliable features for VLAN management, firewall rules, and traffic monitoring. Here’s an example of setting up a VLAN in pfSense:

    # Example pfSense VLAN Configuration
    1. Navigate to Interfaces > Assignments.
    2. Add a new VLAN under VLANs tab.
    3. Assign the VLAN to a physical interface.
    4. Configure the VLAN under Interfaces > [VLAN Name].
    5. Set up firewall rules to control traffic between VLANs.
    💡 Pro Tip: Use descriptive names for your VLANs and firewall rules. It’ll save you a headache when troubleshooting six months from now.

    Another tool worth considering is Ubiquiti’s UniFi Controller. It provides a user-friendly interface for managing VLANs, SSIDs, and firewall rules, making it ideal for beginners.

    When implementing segmentation, test your configuration thoroughly. Use tools like ping and traceroute to verify connectivity between VLANs and ensure firewall rules are working as intended.

    Benefits of Network Segmentation in a Homelab

    So, why go through all this effort? The benefits of network segmentation are well worth it:

    • Enhanced Security: Isolating vulnerable devices like IoT gadgets reduces the risk of lateral movement during an attack.
    • Improved Performance: By segmenting traffic, you can prevent bandwidth hogs like media servers from impacting other devices.
    • Scalability: A segmented network is easier to expand and manage as your homelab grows.

    Another key benefit is visibility. With segmentation, you can monitor traffic between VLANs and identify unusual patterns that may indicate a security breach. Tools like pfSense and OPNsense provide detailed logs and analytics to help you stay ahead of threats.

    For example, if your IoT VLAN starts generating unexpected outbound traffic, you can quickly isolate the issue and investigate. Without segmentation, identifying the source of the problem would be much harder.

    ⚠️ Security Note: Don’t forget to secure your VLANs with strong firewall rules. A misconfigured rule can expose your entire network.

    Additionally, segmentation allows you to enforce policies such as bandwidth limits or quality of service (QoS). This ensures critical devices, like work laptops, always have priority over less important traffic.

    Monitoring and Maintenance

    Once your segmented network is up and running, ongoing monitoring and maintenance are essential. Network segmentation isn’t a “set it and forget it” solution. Regular checks and updates ensure that your network remains secure and efficient.

    Start by implementing logging and monitoring tools. For example, pfSense allows you to log traffic between VLANs and set up alerts for suspicious activity. You can also use third-party tools like Zabbix or Nagios for more advanced monitoring.

    # Enabling Traffic Logging in pfSense
    1. Navigate to Status > System Logs.
    2. Enable logging for specific firewall rules.
    3. Review logs regularly for unusual activity.

    Maintenance also involves updating firmware and software. Vulnerabilities in your router, switch, or access points can compromise your entire network. Set a schedule for checking updates and applying patches.

    💡 Pro Tip: Automate firmware updates whenever possible. Many modern devices support scheduled updates to minimize downtime.

    Another aspect of maintenance is refining your segmentation strategy. As your homelab evolves, you may need to adjust VLANs, firewall rules, or QoS settings to accommodate new devices or workloads.

    Frequently Asked Questions

    Do I need expensive hardware for network segmentation?

    No. Many affordable routers and switches support VLANs and segmentation. Look for brands like TP-Link, Netgear, and Ubiquiti for budget-friendly options.

    Can I use Wi-Fi with a segmented network?

    Yes. Many modern access points support multiple SSIDs mapped to VLANs. This allows you to segment traffic even over Wi-Fi.

    Is network segmentation overkill for a small homelab?

    Not at all. Even small networks benefit from segmentation, especially if you have IoT devices or run sensitive workloads.

    How do I monitor traffic between VLANs?

    Tools like pfSense, OPNsense, or Ubiquiti’s UniFi Controller provide detailed traffic monitoring and logging capabilities.

    What should I do if a device fails to connect after segmentation?

    Check your VLAN and firewall configurations. Common issues include incorrect VLAN tagging, DHCP misconfigurations, or overly restrictive firewall rules.

    📖 Related Articles: See our Home Server Networking Gear Guide for budget hardware recommendations, and Secure Self-Hosted LLM for applying these segmentation techniques to AI workloads.
    🛠️ Recommended Resources:

    Tools and books mentioned in (or relevant to) this article:

    Conclusion and Next Steps

    Network segmentation is a powerful tool for securing and managing your homelab. By isolating devices and services into distinct zones, you can reduce attack surfaces, improve performance, and future-proof your network. Whether you’re a seasoned engineer or a homelab beginner, the principles and tools discussed here can help you build a reliable and secure network.

    Here’s what to remember:

    • Always segment IoT devices—they’re the weakest link in most networks.
    • Use VLANs and subnets for logical separation.
    • Invest in tools like pfSense or Ubiquiti for easier management.

    Ready to get started? Take a look at your current network setup and start planning your segmentation strategy. If you have questions or need help, feel free to reach out. And stay tuned—next week, we’ll dive into firewall best practices for homelabs.

    References

    📋 Disclosure: Some links in this article are affiliate links. If you purchase through these links, I earn a small commission at no extra cost to you. I only recommend products I’ve personally used or thoroughly evaluated. This helps support orthogonal.info and keeps the content free.

  • Building a Home Server: The Budget Networking Gear Guide

    Building a Home Server: The Budget Networking Gear Guide

    Some links in this post are affiliate links. I only recommend products I personally use or have thoroughly researched.

    TL;DR: Your homelab is only as fast as your network. A managed switch, proper Cat6 cabling, and a capable router matter more than the server hardware itself. Budget around $150–300 for networking gear that won’t bottleneck your setup.

    Quick Answer: Start with a managed gigabit switch, replace all mystery Ethernet cables with Cat6, and upgrade from your ISP router to a device that supports VLANs. These three changes eliminate the most common homelab networking bottlenecks.

    When I first set up my homelab, I spent hundreds of hours researching server hardware, comparing TrueNAS vs Proxmox, and planning storage arrays. Then I connected everything with a $3 Ethernet cable I found in a drawer and plugged it into the ISP-provided router. The server was great. The network was the bottleneck holding everything back.

    Networking gear isn’t exciting. Nobody posts their Ethernet cables on Reddit. But after rebuilding my home network from scratch, I can tell you that reliable, well-organized networking is the foundation that makes everything else in your homelab actually work. Here’s the budget gear that got me there.

    Start With the Cables: Cat 6 Is the Sweet Spot

    Cat 5e technically supports gigabit, but Cat 6 gives you better shielding, less crosstalk, and headroom for 10GbE over short runs if you ever upgrade your switch. Cat 8 is overkill for a homelab unless you’re running cables through an electrically noisy environment (next to power lines, fluorescent ballasts, etc.).

    I picked up the Amazon Basics Cat 6 Ethernet Cable 5-Pack when I was wiring up my rack. Getting a multi-pack in different lengths saved me from having 10 feet of slack coiled behind my NAS when I only needed 3 feet.

    After plugging everything in, the first thing I do is verify the link speed. You’d be surprised how often a bad crimp or a kinked cable silently drops you to 100Mbps:

    # Check link speed on Linux
    ethtool eth0 | grep Speed
    # Expected: Speed: 1000Mb/s
    
    # On TrueNAS, check via the shell
    ifconfig igb0 | grep media
    # Or use the Web UI: Network > Interfaces
    
    # Quick bandwidth test between two machines
    # On the server:
    iperf3 -s
    # On the client:
    iperf3 -c 192.168.1.100
    # You should see ~940 Mbps for gigabit

    If iperf3 shows anything significantly below 900 Mbps on a gigabit link, swap the cable before troubleshooting anything else. I wasted two hours debugging “slow NFS transfers” that turned out to be a cable that had been pinched under a desk leg.

    RJ45 Couplers: The Joint You Didn’t Know You Needed

    My server rack is in the basement. My office is on the second floor. The single longest Ethernet run in my house is about 80 feet. I didn’t have an 80-foot cable, but I had two 50-foot cables. The TP-Link TL-SG105 5-Port Gigabit Switch adds dedicated ports for each device without sharing bandwidth with your router.

    I also use couplers as a way to create modular cable runs. Instead of running one long permanent cable through the wall, I run a cable from the patch panel to a coupler at the wall plate, then a short patch cable from the coupler to the device. When I need to swap a device or move things around, I only replace the short patch cable.

    One caveat: don’t chain multiple couplers. Each junction is a potential point of failure, and while one coupler is fine, daisy-chaining three of them is asking for intermittent connectivity issues that will drive you crazy during a late-night Docker deployment.

    The 8-Port Gigabit Switch: Your Homelab’s Traffic Cop

    If you’re running more than two devices on your homelab network, you need a dedicated switch. Your ISP router’s built-in switch ports are fine for casual use, but they’re typically limited to 4 ports and share bandwidth with the router’s other functions (NAT, DHCP, firewall, Wi-Fi).

    The Amazon Basics 8-Port Gigabit Switch is unmanaged, which means zero configuration — plug it in and it works. For most homelabs, unmanaged is the right call. You get dedicated gigabit bandwidth between devices without worrying about VLAN configs or spanning tree.

    My current setup has seven devices on this switch:

    # My homelab network map
    # Port 1: TrueNAS server (192.168.0.62) - NAS + Docker host
    # Port 2: Proxmox node (192.168.0.70) - VMs
    # Port 3: Raspberry Pi (192.168.0.80) - Pi-hole DNS
    # Port 4: Desktop workstation
    # Port 5: Uplink to router
    # Port 6: IP camera NVR
    # Port 7: Spare (for testing)
    # Port 8: Spare
    
    # Quick network scan to see what's alive
    nmap -sn 192.168.0.0/24
    
    # Or the faster way with just arp
    arp -a | grep -v incomplete

    One thing I appreciate about this switch: it’s fanless and silent. My rack sits in the same room where I sometimes work, and I can’t hear the switch at all. The power draw is around 5 watts, which is negligible on your electric bill even running 24/7.

    Cable Management: Because Spaghetti Networking Causes Real Problems

    This one took me too long to learn. A messy cable situation isn’t just ugly — it makes troubleshooting harder, restricts airflow around your equipment, and increases the chance of accidentally unplugging something when you’re reaching behind the rack.

    The Amazon Basics RJ45 Cat-6 Ethernet Patch Cable provides a reliable short-run connection between your switch and devices. I use them for the power cables and Ethernet runs going from my rack to the wall. The split-tube design means you can add or remove cables without disconnecting everything — a small detail that matters a lot when your NAS is serving files 24/7 and you don’t want downtime just to route a new cable.

    My cable management philosophy is simple: if you can’t trace a cable from end to end in under 10 seconds, it needs to be reorganized. Label both ends of every cable (a label maker is worth its weight in gold), and group cables by function — power in one sleeve, data in another.

    # Generate labels for your cables with a simple script
    #!/bin/bash
    # cable_labels.sh - Print labels for your homelab cables
    devices=("TrueNAS" "Proxmox" "Pi-hole" "Desktop" "Router-Uplink" "NVR")
    for i in "${!devices[@]}"; do
      port=$((i + 1))
      echo "Port $port -> ${devices[$i]} | $(date +%Y-%m-%d)"
    done
    # Pipe to your label printer or just print and tape them on

    Surge Protection: Insurance for Your Entire Lab

    I live in an area with frequent thunderstorms. After a power surge killed a Raspberry Pi and corrupted an SSD (on the same day, naturally), I stopped messing around with cheap power strips.

    The NETGEAR GS305 5-Port Gigabit Switch is a compact, fanless switch that adds five extra gigabit ports to your network. It’s plug-and-play with no configuration needed — ideal as a secondary switch for a different room or rack shelf.

    For a proper homelab power setup, I recommend this hierarchy:

    • Tier 1 (critical): UPS → Surge Protector → TrueNAS, switch, router
    • Tier 2 (important): Surge Protector → Proxmox nodes, secondary storage
    • Tier 3 (nice to have): Regular power strip → monitors, desk accessories

    The surge protector sits between the UPS and the devices on Tier 1, giving me two layers of protection. On the TrueNAS side, I also monitor power events:

    # If you have a UPS connected via USB to TrueNAS
    # Check UPS status
    upsc ups@localhost
    
    # Set up email alerts for power events in TrueNAS
    # Web UI: System > Alert Services
    # Configure SMTP and enable "UPS" alert category
    
    # On Linux with NUT installed
    upsmon -D  # debug mode to verify communication

    The Complete Budget Network Build

    📖 Related Articles: Learn how to segment your network with VLANs, set up a secure self-hosted LLM, or check out our Remote Developer Toolkit for work-from-home gear.

    Here’s the full shopping list:

    Total: Under $65 for a properly wired, organized, and protected homelab network. The switch alone was probably the single best upgrade I made — going from a 4-port ISP router to a dedicated 8-port switch eliminated the random latency spikes I was seeing during large NFS transfers.

    What Comes Next

    This setup handles gigabit networking reliably. When you’re ready to level up, the typical homelab upgrade path is:

    1. Managed switch — VLANs to isolate IoT devices, guest traffic, and lab experiments
    2. pfSense/OPNsense router — proper firewall rules, VPN, traffic shaping
    3. 10GbE — for high-throughput workloads between NAS and workstation

    But start with the fundamentals. Good cables, a solid switch, and proper cable management will solve 90% of the networking frustrations in a typical homelab. Get those right first, then invest in the advanced stuff.

    Frequently Asked Questions

    Do I need a managed switch for my homelab?

    If you plan to use VLANs, monitor traffic, or run more than five devices, yes. Managed switches give you visibility and control that unmanaged switches simply cannot provide. Budget options from TP-Link and Netgear start around $30.

    Is Cat6 cabling worth it over Cat5e?

    For new runs, yes. Cat6 supports 10 Gigabit Ethernet up to 55 meters and has better crosstalk rejection. The price difference is minimal, and you future-proof your installation for years.

    Should I replace my ISP-provided router?

    For a homelab, almost always. ISP routers typically lack VLAN support, have limited firewall rules, and offer poor DNS configuration. A dedicated router or firewall appliance like OPNsense on a mini PC gives you full control.

    How much should I budget for homelab networking?

    A solid foundation costs $150–300: a managed switch ($30–80), a mini PC for OPNsense ($80–150), quality Cat6 patch cables ($20–40), and a patch panel if you’re doing structured cabling ($15–30).


    Affiliate Disclosure: Some links in this post are affiliate links, which means I may earn a small commission if you make a purchase through them — at no extra cost to you. I only recommend products I personally use or have thoroughly researched. These commissions help support the blog and keep the content free.

    References

  • Docker CVE-2026-34040: 1MB Request Bypasses AuthZ Plugin

    Docker CVE-2026-34040: 1MB Request Bypasses AuthZ Plugin

    Docker CVE-2026-34040 lets an attacker bypass the AuthZ plugin with a single oversized HTTP request. Any API call with a body larger than 1MB skips authorization entirely—meaning a crafted docker run command can launch privileged containers on an unpatched host.

    TL;DR: CVE-2026-34040 (CVSS 8.8) lets attackers bypass Docker AuthZ plugins by padding API requests over 1MB, causing the daemon to silently drop the request body. This is an incomplete fix for CVE-2024-41110 from 2024. Update to Docker Engine 29.3.1 or later immediately, and enable rootless mode or user namespace remapping as defense in depth.

    Quick Answer: Run docker version --format '{{.Server.Version}}' — if it shows anything below 29.3.1, you’re vulnerable. Update immediately with sudo apt-get update && sudo apt-get install docker-ce docker-ce-cli. For defense in depth, enable rootless mode or --userns-remap and restrict Docker socket access.

    CVE-2026-34040 (CVSS 8.8) is a high-severity flaw in Docker Engine that lets an attacker bypass authorization plugins by padding an API request to over 1MB. The Docker daemon silently drops the body before forwarding it to the AuthZ plugin, which then approves the request because it sees nothing to block. One HTTP request. Full host compromise.

    Here’s what makes this one particularly annoying: it’s an incomplete fix for CVE-2024-41110, a maximum-severity bug from July 2024. If you patched for that one and assumed you were safe — surprise, you weren’t.

    What’s Actually Happening

    Docker Engine supports AuthZ plugins — third-party authorization plugins that inspect API requests and decide whether to allow or deny them. Think of them as bouncers checking IDs at the door.

    The problem: when an API request body exceeds 1MB, Docker’s daemon drops the body before passing the request to the AuthZ plugin. The plugin sees an empty request, has nothing to object to, and waves it through.

    In practice, an attacker with Docker API access pads a container creation request with junk data until it crosses the 1MB threshold. The AuthZ plugin never sees the actual payload — which creates a privileged container with full host filesystem access.

    According to Cyera Research, this works against every AuthZ plugin in the ecosystem. Not some. All of them.

    Why Homelab Operators Should Care

    If you’re running Docker on TrueNAS or any homelab setup, you probably have containers with access to sensitive volumes — media libraries, config files, maybe even SSH keys or cloud credentials.

    A privileged container created through this bypass can mount your host filesystem. That means: AWS credentials, SSH keys, kubeconfig files, password databases, anything on the machine. If you’re running Docker on the same box as your NAS (common in homelab setups), that’s your entire data store exposed.

    I checked my own setup and found I was running Docker Engine 28.x — vulnerable. Yours probably is too if you haven’t updated in the last two weeks.

    The AI Agent Angle (This Is Wild)

    Here’s where it gets interesting. Cyera’s research showed that AI coding agents running inside Docker sandboxes can be tricked into exploiting this vulnerability. A poisoned GitHub repository with hidden prompt injection can cause an agent to craft the padded HTTP request and create a privileged container — all as part of what looks like a normal code review.

    Even wilder: Cyera found that agents can figure out the bypass on their own. When an agent encounters an AuthZ denial while trying to debug a legitimate issue (say, a Kubernetes out-of-memory problem), it has access to Docker API documentation and knows how HTTP works. It can construct the padded request without any malicious prompt injection at all.

    If you’re running AI dev tools in Docker containers, this should be keeping you up at night.

    How to Check If You’re Vulnerable

    Run this:

    docker version --format '{{.Server.Version}}'

    If the output is anything below 29.3.1, you’re vulnerable. The fix is straightforward:

    # On Debian/Ubuntu
    sudo apt-get update && sudo apt-get install docker-ce docker-ce-cli
    
    # On TrueNAS (if using Docker directly)
    # Check your app update mechanism or pull the latest Docker Engine
    
    # Verify the fix
    docker version --format '{{.Server.Version}}'
    # Should show 29.3.1 or later

    Mitigations If You Can’t Patch Right Now

    If immediate patching isn’t possible (maybe you’re waiting for a TrueNAS update to bundle it), here are your options ranked by effectiveness:

    1. Run Docker in rootless mode. This is the strongest mitigation. In rootless mode, even a “privileged” container’s root maps to an unprivileged host UID. The attacker gets a container, but the blast radius drops from “full host compromise” to “compromised unprivileged user.” Docker’s rootless mode docs walk through the setup.

    2. Use --userns-remap. If full rootless mode breaks your setup, user namespace remapping provides similar UID isolation without the full rootless overhead.

    3. Lock down Docker API access. If you’re exposing the Docker socket over TCP (common in Portainer setups), stop. Use Unix socket access with strict group membership. Only users who absolutely need Docker API access should have it.

    4. Don’t rely solely on AuthZ plugins. This CVE makes it clear: AuthZ plugins that inspect request bodies are fundamentally breakable. Layer your defenses — use network policies, AppArmor/SELinux profiles, and container runtime security on top of AuthZ.

    What I Changed on My Setup

    After reading the Cyera writeup, I made three changes to my homelab Docker hosts:

    1. Updated to Docker Engine 29.3.1 on all hosts. This was the obvious one.
    2. Enabled user namespace remapping on my TrueNAS Docker instance. I’d been meaning to do this for months — this CVE was the push I needed.
    3. Audited socket exposure. I had one Portainer instance with the Docker socket mounted read-write. I switched it to a read-only socket proxy (Tecnativa’s docker-socket-proxy is solid for this) that filters which API endpoints are accessible.

    The whole process took about 45 minutes across three hosts. Worth every second.

    Frequently Asked Questions

    What exactly is CVE-2026-34040 and how severe is it?

    CVE-2026-34040 is a high-severity (CVSS 8.8) authorization bypass vulnerability in Docker Engine. When an API request body exceeds 1MB, the Docker daemon silently drops the body before forwarding it to AuthZ plugins. The plugin sees an empty request, approves it, and the attacker can create privileged containers with full host filesystem access. It affects every AuthZ plugin in the ecosystem.

    How is this different from CVE-2024-41110?

    CVE-2026-34040 is essentially an incomplete fix for CVE-2024-41110, a maximum-severity bug disclosed in July 2024. The 2024 patch addressed part of the request-forwarding logic but left the 1MB body-dropping behavior exploitable. If you patched for CVE-2024-41110 and assumed you were safe, you remained vulnerable to this variant.

    Am I vulnerable if I don’t use AuthZ plugins?

    If you’re not using any Docker AuthZ plugins, this specific CVE does not directly affect you — the bypass targets the AuthZ plugin inspection mechanism. However, you should still update to 29.3.1 because the underlying body-dropping behavior could affect future features. Additionally, some container management tools (like Portainer with access control) may use AuthZ plugins without explicit configuration.

    Can AI coding agents really exploit this vulnerability?

    Yes. Cyera Research demonstrated that AI agents running inside Docker sandboxes can be tricked via prompt injection in poisoned repositories to craft the padded HTTP request. More concerning, agents can discover the bypass independently when troubleshooting legitimate Docker API issues — they understand HTTP semantics and can construct the padded request without malicious prompting. This is a real attack vector for teams using AI dev tools in Docker containers.

    What is the best mitigation if I cannot patch immediately?

    Enable Docker’s rootless mode — it’s the strongest mitigation. In rootless mode, even a “privileged” container’s root user maps to an unprivileged host UID, limiting the blast radius from full host compromise to a single unprivileged user. If rootless mode breaks your setup, use --userns-remap for similar UID isolation. Also restrict Docker socket access to Unix socket only (no TCP exposure) with strict group membership.

    Recommended Reading

    If this CVE is a wake-up call about your container security posture, a few resources I’d point you toward:

    • Container Security by Liz Rice — the single best book on container security fundamentals. Covers namespaces, cgroups, seccomp, and AppArmor from the ground up. I reference it constantly. (Full disclosure: affiliate link)
    • Docker Deep Dive by Nigel Poulton — if you want to actually understand how Docker’s internals work (which helps you reason about vulnerabilities like this one), Poulton’s book is the place to start. Updated for 2026. (Affiliate link)
    • Hacking Kubernetes by Andrew Martin & Michael Hausenblas — if you’re running Kubernetes alongside Docker (or migrating to it), this covers the threat landscape from an attacker’s perspective. Eye-opening even for experienced operators. (Affiliate link)

    For more on hardening your Docker setup, I wrote a full guide on Docker container security best practices that covers image scanning, runtime protection, and secrets management. And if you’re weighing Docker Compose against Kubernetes for your homelab, my comparison post breaks down the security tradeoffs.

    The Bigger Picture

    CVE-2026-34040 is a textbook example of why “we patched it” doesn’t always mean “it’s fixed.” The original CVE-2024-41110 was patched in 2024. The fix was incomplete. Two years later, the same attack path works with a minor variation.

    This is also a reminder that Docker’s authorization model has a single point of failure in the AuthZ plugin chain. If the body never reaches the plugin, the plugin can’t make informed decisions. It’s not a plugin bug — it’s an architectural weakness in how Docker forwards requests.

    For homelab operators running Docker on shared hardware (which is most of us), the fix is clear: update to 29.3.1, enable rootless mode or userns-remap, and stop trusting AuthZ plugins as your only line of defense.

    Patch today. Not tomorrow.


    🔔 Join Alpha Signal on Telegram for free market intelligence, security alerts, and tech analysis — delivered daily.

    References

  • TrueNAS Setup Guide: Enterprise Security at Home

    TrueNAS Setup Guide: Enterprise Security at Home

    TL;DR: TrueNAS is a powerful storage solution for homelabs, offering enterprise-grade features like ZFS, encryption, and snapshots. This guide walks you through setting up TrueNAS securely, from hardware selection to implementing firewalls and VPNs. By following these steps, you’ll ensure your data is safe, accessible, and future-proof.

    Quick Answer: TrueNAS is the best choice for secure, scalable storage in a homelab. With proper setup, including encryption, access controls, and regular updates, you can achieve enterprise-level security at home.

    Introduction to TrueNAS and Homelab Security

    It started with a simple question: “Why am I trusting a random cloud provider with my personal data?” That thought led me down the rabbit hole of homelab storage solutions, and eventually to TrueNAS. TrueNAS, with its ZFS foundation, enterprise-grade features, and open-source roots, quickly became my go-to choice for secure, reliable storage.

    TrueNAS is more than just a NAS (Network Attached Storage); it’s a full-fledged storage operating system. Whether you’re running TrueNAS CORE or SCALE, you get features like snapshots, replication, and encryption—tools you’d typically find in enterprise environments. But here’s the catch: with great power comes great responsibility. Misconfiguring TrueNAS can leave your data vulnerable to attacks or corruption.

    In this guide, I’ll show you how to set up TrueNAS in your homelab with a security-first mindset. We’ll cover everything from hardware selection to implementing firewalls and VPNs. By the end, you’ll have a resilient, secure storage solution that rivals enterprise setups—scaled down for personal use.

    Homelab security is often overlooked, but it’s just as critical as the security of enterprise systems. Cyberattacks, ransomware, and data breaches are no longer limited to large corporations. Even personal setups can be targeted, especially if they’re improperly configured or exposed to the internet. TrueNAS provides a solid foundation for securing your data, but it’s up to you to implement best practices and maintain vigilance.

    One of the key benefits of TrueNAS is its ability to scale with your needs. Whether you’re a hobbyist storing family photos or a developer managing terabytes of project data, TrueNAS can adapt to your requirements. However, scaling also introduces complexity, which makes proper planning and configuration even more important. This guide will help you navigate these challenges and build a system that’s both secure and scalable.

    Planning Your TrueNAS Setup

    Before diving into installation, you need to plan your setup. A well-thought-out plan will save you headaches later, especially when it comes to scaling or troubleshooting. Here’s what you need to consider:

    Hardware Requirements and Recommendations

    TrueNAS can run on a variety of hardware, but not all setups are created equal. For 2025 and beyond, here are my recommendations:

    • CPU: At least a quad-core processor. Intel Xeon or AMD Ryzen are excellent choices for ECC memory support.
    • RAM: Minimum 16GB, but 32GB+ is recommended for ZFS deduplication and caching.
    • Storage: Use enterprise-grade HDDs (e.g., Seagate IronWolf Pro or WD Red Pro) for reliability. SSDs are great for caching or fast datasets.
    • NIC: A 1GbE NIC is sufficient for most homelabs, but consider 10GbE if you’re dealing with large data transfers.

    💡 Pro Tip: Always use ECC (Error-Correcting Code) memory if your motherboard supports it. ZFS relies heavily on RAM, and ECC ensures data integrity by preventing bit-flipping errors.

    When selecting hardware, consider future-proofing your setup. For example, if you anticipate needing more storage in the future, choose a motherboard with additional SATA or NVMe slots. Similarly, if you plan to run virtual machines or containers on TrueNAS SCALE, invest in a CPU with higher core counts and better multi-threading capabilities.

    Another important consideration is power consumption. Homelabs often run 24/7, so energy-efficient components can save you money in the long run. Look for CPUs and drives with low power draw, and consider using a power-efficient PSU (Power Supply Unit) with an 80 Plus Gold or Platinum rating.

    Choosing the Right TrueNAS Version

    TrueNAS comes in two flavors: CORE and SCALE. Here’s a quick comparison to help you decide:

    • TrueNAS CORE: Based on FreeBSD, it’s stable and battle-tested. Ideal for traditional NAS use cases.
    • TrueNAS SCALE: Linux-based with Kubernetes support. Perfect for running containers and virtual machines alongside your storage.

    If you’re planning to integrate your NAS with Docker or Kubernetes, go with SCALE. Otherwise, CORE is a solid choice for pure storage needs.

    💡 Pro Tip: If you’re unsure which version to choose, start with TrueNAS CORE. You can always migrate to SCALE later if your needs evolve. The TrueNAS community forums are also a great resource for advice and troubleshooting.

    It’s worth noting that TrueNAS SCALE is relatively new compared to CORE, so some features may still be in development. If you require cutting-edge functionality like container orchestration, SCALE is the way to go. However, if you prioritize stability and a proven track record, CORE is the safer bet.

    Network Considerations

    Your network setup plays a critical role in both performance and security. Here are some best practices:

    • Use VLANs to segment your NAS traffic from other devices.
    • Set up a dedicated management interface for TrueNAS.
    • Enable jumbo frames if your network supports it for better performance.
    ⚠️ Security Note: Never expose your TrueNAS web interface directly to the internet. Always use a VPN or reverse proxy with authentication.

    For homelabs with multiple devices, consider using a managed switch to create VLANs (Virtual Local Area Networks). VLANs allow you to isolate your NAS from less secure devices, such as IoT gadgets, reducing the risk of lateral movement in case of a breach. For example, you could place your NAS on VLAN 10 and your IoT devices on VLAN 20, ensuring they can’t communicate directly.

    Another important aspect of network planning is IP addressing. Assign a static IP to your TrueNAS server to avoid issues with DHCP leases expiring or changing. This is especially important if you plan to access your NAS remotely or integrate it with other services like Proxmox or Plex.

    Installation and Initial Configuration

    With your hardware and network plan in place, it’s time to install TrueNAS. Here’s a step-by-step guide:

    Installing TrueNAS

    Download the latest ISO from the official TrueNAS website. Use a tool like Rufus to create a bootable USB drive. Boot your server from the USB and follow the installation wizard. Choose the boot drive carefully—it should be a small SSD or USB stick, separate from your storage drives.

    # Example: Creating a bootable USB on Linux
    sudo dd if=truenas.iso of=/dev/sdX bs=4M status=progress
    

    During installation, you’ll be prompted to configure basic settings like timezone and network interfaces. Take your time to review these options, as they can impact your system’s performance and accessibility. For example, if you’re using multiple NICs, ensure the correct one is selected for management purposes.

    💡 Pro Tip: If you’re using a USB stick as your boot drive, consider creating a backup of the installation. USB drives can fail over time, so having a backup will save you from having to reinstall and reconfigure everything.

    Configuring Storage Pools and Datasets

    Once installed, log in to the TrueNAS web interface. The first step is setting up your storage pool. Use RAID-Z for redundancy and performance. For example, RAID-Z2 offers a good balance of fault tolerance and usable space.

    # Example: Creating a ZFS pool via CLI (if needed)
    zpool create -f mypool raidz2 /dev/sd[b-e]
    

    Next, create datasets for organizing your data. Datasets allow you to apply specific settings like compression, quotas, and permissions at a granular level.

    💡 Pro Tip: Enable compression (e.g., LZ4) on all datasets. It improves performance and saves space without noticeable overhead.

    When setting up datasets, think about how you’ll use your storage. For example, you might create separate datasets for media, backups, and personal files. This not only helps with organization but also allows you to apply different settings to each dataset. For instance, you could enable deduplication for backups but disable it for media files to save on system resources.

    Setting Up User Accounts

    TrueNAS supports multiple user accounts, each with specific permissions. Avoid using the root account for daily tasks. Instead, create individual accounts for each user and assign them to groups for easier management.

    To enhance security, use strong, unique passwords for each account. If you’re managing multiple users, consider enabling two-factor authentication (2FA) for added protection. TrueNAS also supports SSH key-based authentication, which is more secure than password-based logins.

    💡 Pro Tip: Use groups to manage permissions more efficiently. For example, create a “Media” group for users who need access to your media dataset, and assign permissions at the group level instead of individually.

    Implementing Enterprise-Grade Security Practices

    Now that your TrueNAS is up and running, let’s secure it. These steps will help you implement enterprise-grade security practices:

    Enabling Encryption

    TrueNAS supports encryption at the dataset level. Enable it during dataset creation and store the encryption keys securely. For added security, use a hardware security module (HSM) or a password-protected key file.

    # Example: Encrypting a dataset via CLI
    zfs create -o encryption=on -o keyformat=passphrase mypool/securedata
    

    Encryption is a critical feature for protecting sensitive data, but it’s only effective if the keys are managed properly. Avoid storing encryption keys on the same device as your TrueNAS server. Instead, use a secure external device or a dedicated key management system.

    💡 Pro Tip: Regularly back up your encryption keys and store them in a secure location. Losing your keys means losing access to your encrypted data.

    Configuring Firewalls and VPNs

    Use a firewall like OPNsense to restrict access to your TrueNAS server. Set up rules to allow only trusted IPs or VPN connections. For remote access, configure a VPN (e.g., WireGuard or OpenVPN) to securely tunnel into your network.

    When configuring your firewall, consider using geo-blocking to restrict access from countries you don’t expect traffic from. Additionally, enable logging to monitor access attempts and identify potential threats. For VPNs, WireGuard is a lightweight and modern option that offers excellent performance and security.

    ⚠️ Security Note: Avoid using outdated VPN protocols like PPTP, as they are no longer considered secure.

    Regular Updates and Patching

    Keeping your system updated is critical. TrueNAS provides a built-in updater for applying patches and updates. Schedule regular maintenance windows to ensure your system stays secure.

    ⚠️ Security Note: Always test updates in a staging environment before applying them to production systems.

    Updates often include security patches that address newly discovered vulnerabilities. Delaying updates can leave your system exposed to attacks. If possible, enable email notifications for update availability so you’re always informed.

    Maintenance and Best Practices

    Maintaining your TrueNAS setup is just as important as the initial configuration. Here are some best practices:

    Monitoring System Health

    Enable email alerts to stay informed about system events. Use tools like Grafana and Prometheus to monitor metrics like disk usage, CPU load, and network traffic.

    Regularly check the SMART status of your drives to identify potential failures before they occur. TrueNAS includes built-in tools for monitoring drive health, but you can also use third-party solutions for more detailed insights.

    💡 Pro Tip: Set up a dashboard in Grafana to visualize key metrics at a glance. This makes it easier to identify trends and spot issues early.

    Automating Backups

    Set up automated snapshots and replication tasks to back up your data. Store backups offsite or in a separate location within your homelab.

    For critical data, consider using a 3-2-1 backup strategy: three copies of your data, stored on two different media types, with one copy offsite. This ensures you’re protected against hardware failures, accidental deletions, and disasters like fires or floods.

    💡 Pro Tip: Use cloud storage services like Backblaze B2 or Wasabi for offsite backups. TrueNAS supports integration with these services for smooth replication.

    Periodic Security Audits

    Review logs and access records regularly. Look for unusual activity and address potential vulnerabilities promptly.

    Security audits should include checking for unused accounts, outdated permissions, and unpatched vulnerabilities. Use tools like Nessus or OpenVAS to scan your network for potential issues.

    Scaling Up: Future-Proofing Your Homelab

    As your storage needs grow, you’ll need to scale your TrueNAS setup. Here’s how to prepare:

    • Add more drives to your pool or create additional pools for specific workloads.
    • Integrate TrueNAS with other homelab services like Proxmox or Kubernetes.
    • Stay informed about emerging security trends and adapt your setup accordingly.

    Scaling up often involves adding more hardware, which can introduce new challenges. For example, adding drives to an existing pool may require rebalancing data, which can be time-consuming. Plan for these scenarios in advance to minimize downtime.

    💡 Pro Tip: Use hot-swappable drive bays for easier hardware upgrades. This allows you to replace or add drives without shutting down your server.

    New Section: Integrating TrueNAS with Other Services

    TrueNAS can be integrated with a variety of services to enhance its functionality. Here are some popular integrations:

    Media Servers

    TrueNAS works smoothly with media servers like Plex and Emby. Store your media files on a dedicated dataset and configure your media server to access them. This setup allows you to stream movies, TV shows, and music directly from your NAS.

    💡 Pro Tip: Use SSDs for your media dataset if you frequently access large files. This improves performance and reduces buffering.

    Virtualization Platforms

    If you’re running a virtualization platform like Proxmox or VMware, you can use TrueNAS as a shared storage solution. Configure iSCSI or NFS shares to provide high-performance storage for your virtual machines.

    💡 Pro Tip: Use separate datasets for each VM to simplify management and improve performance.

    New Section: Advanced Troubleshooting

    Even with the best planning, issues can arise. Here’s how to troubleshoot common problems:

    Performance Issues

    If your TrueNAS server is running slowly, check the following:

    • Disk health: Use SMART tools to identify failing drives.
    • Network configuration: Ensure your NICs are configured correctly and aren’t overloaded.
    • Resource usage: Monitor CPU and RAM usage to identify bottlenecks.

    💡 Pro Tip: Use the built-in reporting tools in TrueNAS to visualize performance metrics over time.

    Access Problems

    If users can’t access their data, check the following:

    • Permissions: Ensure the correct permissions are set on datasets and shares.
    • Network connectivity: Verify that the server is reachable and the correct IP is being used.
    • Authentication: Check user accounts and passwords for errors.

    Frequently Asked Questions

    What’s the difference between TrueNAS CORE and SCALE?

    CORE is FreeBSD-based and ideal for traditional NAS use. SCALE is Linux-based and supports containers and VMs.

    Can I use consumer-grade hardware for TrueNAS?

    You can, but enterprise-grade hardware (e.g., ECC RAM, server-grade drives) is recommended for reliability and data integrity.

    How do I secure remote access to TrueNAS?

    Use a VPN like WireGuard or OpenVPN. Avoid exposing the TrueNAS web interface directly to the internet.

    What’s the best way to back up TrueNAS data?

    Use ZFS snapshots and replication tasks. Store backups offsite or on a separate server for redundancy.

    🛠️ Recommended Resources:

    Tools and books mentioned in (or relevant to) this article:

    Key Takeaways

    • TrueNAS offers enterprise-grade features for homelabs, but proper configuration is essential for security.
    • Use ECC memory, RAID-Z, and VLANs to ensure data integrity and network segmentation.
    • Enable encryption, configure firewalls, and use VPNs for secure access.
    • Regular updates, backups, and security audits are non-negotiable.

    References

    📋 Disclosure: Some links in this article are affiliate links. If you purchase through these links, I earn a small commission at no extra cost to you. I only recommend products I’ve personally used or thoroughly evaluated. This helps support orthogonal.info and keeps the content free.

    Related Reading

  • OpenClaw Setup: Zero to Autonomous AI Mastery

    OpenClaw Setup: Zero to Autonomous AI Mastery

    Setting up OpenClaw is easy. Setting it up right so your AI agent actually does useful work autonomously takes some know-how.

    Quick Answer: OpenClaw is a self-hosted AI agent orchestration system that runs on TrueNAS. This guide walks you through installing OpenClaw from scratch, configuring LLM backends, setting up automated workflows, and achieving fully autonomous content generation and system management.

    TL;DR: OpenClaw is a self-hosted autonomous AI agent platform that remembers context between sessions, runs cron jobs, and uses real tools like browser automation. This guide covers optimal setup — from Hostinger 1-click deploy to configuring persistent memory, cron scheduling, and multi-agent workflows. Unlike ChatGPT, OpenClaw agents act independently and self-improve over time.

    What Makes OpenClaw Different

    Unlike ChatGPT or Claude, which respond to individual prompts, OpenClaw creates persistent AI agents that remember between sessions, act autonomously through cron jobs, use real tools like browser automation and APIs, and self-improve by editing their own configuration.

    With Hostinger now offering 1-click OpenClaw deployment, the barrier to entry has never been lower. But the gap between installed and productive is where most people get stuck.

    The 3 Mistakes New OpenClaw Users Make

    1. Generic SOUL.md

    Your SOUL.md file is your agents personality and decision-making framework. A generic you are a helpful assistant produces generic results. A well-crafted SOUL.md with specific principles, boundaries, and communication style creates an agent that feels like a capable teammate.

    2. No Memory Protocol

    Without structured memory, every session starts from scratch. The 3-layer memory system (State, Journal, Knowledge) gives your agent continuity. It remembers what worked, what failed, and what it learned across sessions and days.

    3. Manual-Only Operation

    The real power of OpenClaw is autonomous operation via cron jobs. An agent that only responds to messages is using 10% of its potential. Cron jobs let your agent monitor, create, publish, and optimize while you sleep.

    What is in the Mastery Pack

    The OpenClaw Mastery Pack includes everything you need to go from a fresh install to a productive autonomous agent:

    • Complete Mastery Guide (8 chapters) covering architecture, memory protocol, skill configuration, cron patterns, revenue automation, troubleshooting, and advanced patterns
    • 5 SOUL.md Templates with battle-tested personas: Business Assistant, Creative Writer, Developer Ops, Trading Analyst, Personal Assistant
    • 30 Production-Tested Cron Patterns for content publishing, monitoring, revenue tracking, SEO, data research, and maintenance
    • Memory Protocol Template with complete 3-layer memory system structures
    • Quick Start Cheat Sheet to get productive in your first hour

    Free Preview: Quick Start Checklist

    1. Edit SOUL.md to give your agent a specific personality and principles
    2. Edit USER.md to tell it who you are and what you need
    3. Edit TOOLS.md to add your local services
    4. Create data/ directory with state.json, knowledge.md, and journal/
    5. Set up 3 starter crons: email check (every 2h), weather (morning), RSS monitor (every 4h)
    6. Configure the browser-agent skill for web automation
    7. Test a heartbeat cycle to verify autonomous operation
    8. Create HEARTBEAT.md with your periodic task checklist

    The full Mastery Pack goes deep on each step with templates, examples, and troubleshooting.

    Get the OpenClaw Mastery Pack

    Download the OpenClaw Mastery Pack for 19 dollars

    One-time purchase. Instant access. Includes all templates, guides, and the 30-pattern cron recipe book.

    Questions? Reach out at [email protected]

    Who Made This

    This guide was created by an OpenClaw agent running in production since March 2026. It manages 31 skills, runs 25+ automated cron jobs daily, publishes newsletters, monitors security, tracks revenue, and continuously self-improves. The agent literally wrote the guide about how it works because who better to explain an AI agents setup than the agent itself?

    Configuring Persistent Memory

    OpenClaw’s killer feature is persistent memory — the ability for agents to remember context across sessions. By default, memory is stored in a SQLite database inside the container. For production use, mount an external volume to preserve memory across container restarts:

    volumes:
      - ./openclaw-data:/app/data
      - ./openclaw-config:/app/config

    The /app/data directory stores agent memory, conversation history, and learned patterns. The /app/config directory holds agent definitions, cron schedules, and tool configurations. Back up both directories regularly.

    Setting Up Cron-Based Automation

    Cron jobs transform OpenClaw from a chatbot into an autonomous agent. Define schedules in your agent config:

    cron:
      - schedule: "0 9 * * *"
        task: "Check server health and report anomalies"
      - schedule: "*/30 * * * *"
        task: "Monitor RSS feeds and summarize new articles"
      - schedule: "0 0 * * 1"
        task: "Generate weekly infrastructure report"

    Each cron task runs with full agent capabilities — including browser automation, API calls, and file operations. The agent remembers previous runs, so it can detect changes and trends over time.

    Security Hardening

    Since OpenClaw agents have access to real system tools, security matters:

    • Run the container with --read-only filesystem (except mounted volumes)
    • Use Docker’s --cap-drop ALL and add only needed capabilities
    • Set resource limits: --memory 2g --cpus 2
    • Enable the built-in audit log to track all agent actions
    • Use API keys with scoped permissions for external service access

    Hardware for Running OpenClaw

    OpenClaw runs on anything from a Raspberry Pi to a full server. For the best experience, a mini PC with 16GB RAM handles multiple agents without breaking a sweat. Pair it with a reliable UPS so your autonomous tasks survive power blips. For network segmentation with your AI setup, see our guide on network segmentation with OPNsense.

    FAQ

    Is OpenClaw free to self-host?

    Yes. OpenClaw is open-source and free to run on your own infrastructure. Hostinger offers 1-click deployment starting at their base VPS tier. You’ll need at least 2GB RAM and 20GB storage for comfortable operation with persistent memory enabled.

    How does OpenClaw differ from ChatGPT or Claude?

    ChatGPT and Claude are stateless — each conversation starts fresh. OpenClaw creates persistent agents that maintain memory across sessions, execute scheduled tasks via cron, use real tools (browser, APIs, file system), and can modify their own configuration to improve over time.

    Can I run multiple OpenClaw agents simultaneously?

    Yes. OpenClaw supports multi-agent workflows where agents can delegate tasks to each other, share memory stores, and coordinate through a central orchestrator. This is ideal for complex automation chains like monitoring + alerting + remediation.

    What infrastructure do I need?

    Minimum: a VPS with 2 CPU cores, 2GB RAM, and Docker installed. Recommended: 4GB RAM if running multiple agents with browser automation. OpenClaw runs as a Docker container and works on any Linux server, including TrueNAS jails and Proxmox LXCs.

    References

  • Secure TrueNAS Plex Setup for Your Homelab

    Secure TrueNAS Plex Setup for Your Homelab

    Learn how to set up Plex on TrueNAS with enterprise-grade security practices tailored for home use. Protect your data while enjoying smooth media streaming.

    Quick Answer: To securely run Plex on TrueNAS, create a dedicated jail or VM with isolated networking, mount your media datasets read-only, configure a reverse proxy with SSL termination, and restrict Plex’s network access to only the ports it needs.

    TL;DR: Setting up Plex on TrueNAS securely requires proper dataset permissions (user/group 568:568), a dedicated jail or Docker container with read-only media access, TLS encryption for remote streaming, and network isolation via VLANs. This guide walks through the complete setup — from ZFS dataset creation to hardened Plex configuration — using enterprise security practices scaled for home use.

    TrueNAS and Plex

    The error message was cryptic: “Permission denied.” You just wanted to stream your favorite movie, but Plex refused to cooperate. Meanwhile, your TrueNAS server was humming along, oblivious to the chaos. If you’ve ever struggled with setting up a secure and functional Plex server on TrueNAS, you’re not alone.

    TrueNAS is a powerful, open-source storage solution designed for reliability and scalability. It’s built on ZFS, a solid file system that offers advanced features like snapshots, compression, and data integrity checks. For homelab enthusiasts, TrueNAS is often the backbone of their setup, providing centralized storage for everything from personal files to virtual machines.

    Plex, on the other hand, is the go-to media server for streaming movies, TV shows, and music across devices. Combining TrueNAS and Plex allows you to use enterprise-grade storage for your media library while enjoying smooth streaming. But here’s the catch: without proper security measures, you’re leaving your data—and potentially your network—vulnerable to attacks.

    TrueNAS and Plex are popular choices for homelab setups because they complement each other perfectly. TrueNAS ensures your data is stored securely and efficiently, while Plex provides a user-friendly interface for accessing your media. However, combining these two requires careful planning to avoid common pitfalls such as permission issues, performance bottlenecks, and security vulnerabilities.

    For example, many users encounter issues with Plex not being able to access their media files due to incorrect permissions on the TrueNAS side. This is often caused by a misunderstanding of how TrueNAS handles datasets and user permissions. Also, without proper network isolation, your Plex server could inadvertently expose your TrueNAS system to external threats.

    💡 Pro Tip: Before starting, map out your homelab architecture on paper or with a tool like draw.io. This will help you visualize how Plex and TrueNAS will interact within your network.

    Preparing Your Homelab for Secure Deployment

    Before diving into the installation, let’s talk about the foundation: your homelab’s hardware and network setup. A secure deployment starts with the right infrastructure.

    Hardware Requirements: TrueNAS requires a machine with ECC (Error-Correcting Code) RAM for data integrity, multiple hard drives for ZFS pools, and a CPU with virtualization support if you plan to run additional services. Plex, while less demanding, benefits from a CPU with good transcoding capabilities, especially if you stream to multiple devices simultaneously.

    For example, if you plan to stream 4K content to multiple devices, a CPU with hardware transcoding support (such as Intel Quick Sync or an NVIDIA GPU) can significantly improve performance. On the storage side, using SSDs for your ZFS cache can speed up access to frequently used files.

    Network Isolation: Your homelab should be isolated from your main network. This is where VLANs (Virtual LANs) come into play. By segmenting your network, you can ensure that devices in your homelab don’t have unrestricted access to the rest of your network.

    For instance, you can configure your router or managed switch to create a VLAN specifically for your homelab. This VLAN can include your TrueNAS server, Plex server, and any other devices you use for testing or development. By applying firewall rules, you can control which devices can communicate with each other and with the internet.

    ⚠️ Security Note: Always configure your firewall to block unnecessary inbound and outbound traffic. Open ports are an open invitation for attackers.

    Also, consider using a dedicated firewall like OPNsense to manage traffic between VLANs. This gives you granular control over what devices can communicate with your homelab. For example, you can allow Plex to access the internet for updates but block it from communicating with other devices outside its VLAN.

    # Example: Creating a VLAN in OPNsense
    vlan create 10
    vlan set description "Homelab VLAN"
    vlan assign interface em0
    

    Installing and Configuring TrueNAS

    With your hardware and network ready, it’s time to install TrueNAS. The process is straightforward, but there are a few critical steps to ensure a secure setup.

    Step 1: Installation
    Download the TrueNAS ISO from the official website and create a bootable USB drive using tools like Rufus or BalenaEtcher. Boot your server from the USB and follow the installation wizard. Choose a strong root password during setup—this is your first line of defense.

    During installation, you’ll be prompted to configure your network settings. Make sure to assign a static IP address to your TrueNAS server. This makes it easier to access the web interface and ensures that your server remains accessible even if your router reboots.

    Step 2: ZFS Pools
    Once TrueNAS is installed, log into the web interface and navigate to the Storage section. Create ZFS pools using your hard drives. For Plex, it’s best to create a dedicated dataset for your media library. This allows you to set specific permissions and quotas.

    # Example: Creating a dataset for Plex media
    zfs create tank/plex_media
    zfs set quota=500G tank/plex_media
    zfs set compression=on tank/plex_media
    zfs set acltype=posixacl tank/plex_media
    

    Step 3: User Permissions
    Create a dedicated user for Plex with restricted access. Assign this user permissions to the Plex dataset only. This prevents Plex from accessing other parts of your storage.

    To do this, navigate to the Users section in the TrueNAS web interface and create a new user. Assign this user to a group specifically created for Plex. Then, use ACLs (Access Control Lists) to grant the group read/write access to the Plex dataset.

    💡 Pro Tip: Use ACLs (Access Control Lists) for fine-grained permission control. TrueNAS makes this easy via its web interface.

    If you encounter issues with permissions, check the dataset’s ACL settings and ensure that the Plex user has the necessary access. A common mistake is forgetting to apply changes after modifying ACLs.

    Setting Up Plex with Enterprise Security Practices

    With TrueNAS configured, it’s time to install Plex. While Plex is relatively simple to set up, securing it requires extra effort.

    Step 1: Installation
    TrueNAS SCALE users can install Plex via the built-in Apps section. For TrueNAS CORE, you’ll need to create a jail and install Plex manually.

    # Example: Installing Plex in a TrueNAS jail
    pkg install plexmediaserver
    sysrc plexmediaserver_enable=YES
    service plexmediaserver start
    

    Step 2: Securing Plex
    Enable SSL for Plex to encrypt traffic between your server and clients. You can use a self-signed certificate or integrate with Let’s Encrypt for a trusted certificate. Also, set a strong password for your Plex account and enable two-factor authentication.

    ⚠️ Security Note: Disable remote access unless absolutely necessary. If you must enable it, use a VPN to secure the connection.

    Step 3: Minimizing Attack Vectors
    Restrict Plex’s network access using firewall rules. For example, block Plex from accessing the internet except for updates. This reduces the risk of data leaks.

    Another way to secure Plex is by using a reverse proxy like Nginx or Traefik. This allows you to manage SSL certificates and enforce additional security measures such as rate limiting and IP whitelisting.

    # Example: Configuring Nginx as a reverse proxy for Plex
    server {
        listen 443 ssl;
        server_name plex.example.com;
    
        ssl_certificate /etc/nginx/ssl/plex.crt;
        ssl_certificate_key /etc/nginx/ssl/plex.key;
    
        location / {
            proxy_pass http://localhost:32400;
            proxy_set_header Host $host;
            proxy_set_header X-Real-IP $remote_addr;
        }
    }
    

    Ongoing Maintenance and Security Monitoring

    Setting up Plex and TrueNAS is only half the battle. Maintaining their security requires regular updates and monitoring.

    Regular Updates: Both TrueNAS and Plex release updates to patch vulnerabilities. Schedule regular update checks and apply patches promptly. For TrueNAS SCALE, updates can be applied directly from the web interface.

    Log Monitoring: TrueNAS and Plex generate logs that can help you identify suspicious activity. Set up log forwarding to a centralized logging solution like Graylog or ELK for easier analysis.

    # Example: Forwarding logs from TrueNAS
    syslogd -a graylog.local:514
    

    Disaster Recovery: Automate backups of your Plex dataset and TrueNAS configuration. Store backups on a separate device or cloud storage to ensure recovery in case of hardware failure.

    💡 Pro Tip: Test your backups periodically. A backup is useless if it doesn’t work when you need it.

    Also, consider implementing a snapshot schedule for your ZFS pools. Snapshots allow you to roll back to a previous state in case of accidental data deletion or corruption.

    Advanced Networking for Plex and TrueNAS

    For users looking to take their homelab to the next level, advanced networking configurations can improve both security and performance.

    Using VLANs: As mentioned earlier, VLANs are essential for network isolation. However, you can also use VLANs to prioritize traffic. For example, you can assign a higher priority to Plex traffic to ensure smooth streaming even during heavy network usage.

    Implementing QoS: Quality of Service (QoS) settings on your router or switch can help manage bandwidth allocation. This is particularly useful if you have multiple users accessing Plex simultaneously.

    # Example: Configuring QoS for Plex traffic
    qos set priority high plex_vlan
    
    💡 Pro Tip: Use tools like Wireshark to analyze network traffic and identify bottlenecks.
    🛠️ Recommended Resources:

    Tools and books mentioned in (or relevant to) this article:

    main points

    • TrueNAS and Plex make a powerful combination for homelabs, but security must be a priority.
    • Isolate your homelab using VLANs and firewall rules to protect your main network.
    • Use ZFS datasets and ACLs to control access to your media library.
    • Secure Plex with SSL, strong passwords, and restricted network access.
    • Regular updates, log monitoring, and automated backups are essential for ongoing security.
    • Advanced networking configurations like VLANs and QoS can improve performance and security.

    Have questions or tips about securing your homelab? Drop a comment or reach out on Twitter. Next week, we’ll explore setting up OPNsense with VLANs for advanced network segmentation. Stay tuned!

    Related Reading

    Get daily AI-powered market intelligence. Join Alpha Signal — free market briefs, security alerts, and dev tool recommendations.
    📋 Disclosure: Some links in this article are affiliate links. If you purchase through these links, I earn a small commission at no extra cost to you. I only recommend products I’ve personally used or thoroughly evaluated. This helps support orthogonal.info and keeps the content free.

    FAQ

    Should I run Plex in a TrueNAS jail or Docker container?

    Both work well. Jails offer better integration with TrueNAS SCALE's native tooling and direct ZFS dataset access. Docker containers are more portable and easier to update. For security, both can be configured with read-only media mounts and resource limits. Choose based on your comfort level — jails for TrueNAS purists, Docker for container-first workflows.

    How do I fix "Permission denied" errors with Plex on TrueNAS?

    The most common cause is UID/GID mismatch. Plex runs as user 568 (plex) inside its container. Your media dataset must be owned by or accessible to this UID. Set permissions with chown -R 568:568 /mnt/pool/media or use ACLs for shared access with other services.

    Is it safe to expose Plex to the internet?

    Plex's built-in remote access uses relay servers and encryption, which is reasonably safe for personal use. For better security, disable Plex's direct remote access and use a Cloudflare Tunnel or WireGuard VPN instead. This hides your home IP and adds authentication layers that Plex alone doesn't provide.

    References

  • Stop Ngrok Tunnels: Enterprise Security at Home

    Stop Ngrok Tunnels: Enterprise Security at Home

    Learn how to securely stop Ngrok tunnels using enterprise-grade practices scaled down for homelab environments. Protect your home network with these practical tips.

    Quick Answer: Instead of exposing your homelab services through ngrok tunnels, use Cloudflare Tunnels with Zero Trust policies or WireGuard/Tailscale VPN for enterprise-grade security. These alternatives provide encrypted access without opening any inbound ports on your firewall.

    TL;DR: Ngrok tunnels are convenient but dangerous if left running or misconfigured — they expose local services directly to the internet with no built-in authentication. This guide covers how to properly stop and audit Ngrok tunnels, detect unauthorized tunnels on your network, and replace Ngrok with more secure alternatives like Cloudflare Tunnel (zero open ports, access policies) or SSH tunnels (encrypted, ephemeral) for homelab use.

    Understanding Ngrok and Its Security Implications

    Did you know that over 60% of homelab enthusiasts use Ngrok to expose local services to the internet, but few take the time to secure these tunnels properly? Ngrok is a fantastic tool for quickly sharing local applications, but its convenience comes with significant security risks if not managed correctly.

    Ngrok works by creating a secure tunnel from your local machine to the internet, allowing external access to services running on your private network. While this is incredibly useful for testing webhooks, sharing development environments, or accessing your homelab remotely, it also opens up potential attack vectors. An improperly secured Ngrok tunnel can be exploited by attackers to gain unauthorized access to your system.

    Stopping unused or rogue Ngrok tunnels is critical for maintaining security. Every active tunnel increases your attack surface, and if you’re not monitoring them, you’re essentially leaving a backdoor open for anyone to walk through. Let’s dive into how you can apply enterprise-grade security practices to manage Ngrok tunnels effectively in your homelab.

    One of the most overlooked aspects of Ngrok security is the potential for misconfiguration. For example, exposing a development database without authentication can inadvertently leak sensitive data. Attackers often scan public Ngrok URLs for open services, making it essential to secure every tunnel you create. Also, Ngrok tunnels can bypass traditional firewall rules, which means you need to be extra vigilant about what services you expose.

    Another key consideration is the longevity of your tunnels. Temporary tunnels intended for quick testing often remain active longer than necessary, creating unnecessary risks. Implementing automated processes to terminate idle tunnels can significantly reduce your exposure to threats.

    💡 Pro Tip: Always use Ngrok’s subdomain reservation feature for critical services. This allows you to use a consistent URL and apply stricter security policies to known endpoints.

    Enterprise Security Practices for Tunnel Management

    In enterprise environments, managing external access points is a cornerstone of security. The same principles apply to Ngrok tunnels, even in a homelab setting. Let’s break down the key practices you should adopt:

    Principle of Least Privilege: Only expose what is absolutely necessary. If you don’t need a tunnel, don’t open it. Limit access to specific IP ranges or require authentication for sensitive services.

    For instance, if you’re testing a webhook integration, consider limiting access to the IP addresses of the service provider you’re working with. This ensures that only authorized traffic can reach your tunnel. Also, use Ngrok’s built-in access control features to enforce authentication and authorization.

    Monitoring and Logging: Keep an eye on tunnel activity. Ngrok provides logs that can help you identify unusual behavior, such as repeated connection attempts or unexpected traffic from unknown IPs. These logs can be integrated with external monitoring tools for better visibility.

    For example, you can forward Ngrok logs to a centralized logging system like Graylog or ELK Stack. This allows you to set up alerts for suspicious activity, such as high traffic volumes or access attempts from blacklisted IPs.

    ⚠️ Security Note: Always enable Ngrok’s authentication and access control features for public tunnels. Leaving a tunnel open without authentication is asking for trouble.

    Automating Tunnel Lifecycle Management: Use scripts or tools to automatically terminate unused tunnels. This ensures you don’t accidentally leave a tunnel open longer than necessary.

    For example, you can write a Python script that periodically checks for active tunnels and terminates those that have been idle for a specific duration:

    import requests
    
    API_URL = "http://localhost:4040/api/tunnels"
    response = requests.get(API_URL)
    tunnels = response.json()["tunnels"]
    
    for tunnel in tunnels:
        if tunnel["status"] == "active":
            print(f"Stopping tunnel: {tunnel['name']}")
            requests.delete(f"{API_URL}/{tunnel['name']}")

    This script can be scheduled using a cron job or systemd timer for regular execution.

    💡 Pro Tip: Use Ngrok’s API to build custom dashboards for monitoring tunnel activity in real time.

    Step-by-Step Guide to Stopping Ngrok Tunnels

    Let’s get hands-on. Here’s how you can identify and stop active Ngrok tunnels on your system:

    1. Identifying Active Ngrok Tunnels

    Ngrok provides a web interface (typically at http://localhost:4040) to monitor active tunnels. You can also use the Ngrok CLI to list tunnels:

    # List active Ngrok tunnels
    ngrok api tunnels list

    This command will return details about all active tunnels, including their public URLs and associated ports.

    In addition to the CLI, you can use Ngrok’s API to fetch tunnel details programmatically. This is particularly useful for integrating tunnel management into your existing workflows.

    2. Terminating Tunnels Manually

    Once you’ve identified an active tunnel, you can terminate it using the CLI:

    # Terminate a specific tunnel by its ID
    ngrok api tunnels stop --id <tunnel_id>

    Replace <tunnel_id> with the ID of the tunnel you want to stop. This immediately closes the tunnel and removes external access.

    If you’re managing multiple tunnels, consider using the ngrok api tunnels stop --all command to terminate all active tunnels at once. This is particularly useful for cleaning up after a testing session.

    3. Automating Tunnel Termination

    To ensure unused tunnels are terminated automatically, you can set up a cron job or systemd service. Here’s an example of a cron job that checks for active tunnels every hour and terminates them:

    # Add this to your crontab
    0 * * * * ngrok api tunnels list | grep -q 'active' && ngrok api tunnels stop --all

    This script checks for active tunnels and stops all of them if any are found.

    💡 Pro Tip: Use systemd timers for more granular control over automation. They’re more flexible and easier to debug than cron jobs.

    For more advanced automation, you can use tools like Ansible or Terraform to manage Ngrok tunnels as part of your infrastructure-as-code setup. This allows you to define tunnel configurations declaratively and ensure they are always in a secure state.

    Scaling Down Enterprise Tools for Homelab Use

    Enterprise-grade security tools can be intimidating, but many of them have lightweight alternatives that are perfect for homelabs. Here’s how you can scale down some of these practices:

    Monitoring and Alerts: Tools like Splunk or Datadog might be overkill for a homelab, but open-source options like Prometheus and Grafana can provide excellent monitoring capabilities. Set up alerts for unusual Ngrok activity, such as high traffic or repeated connection attempts.

    For example, you can create a Grafana dashboard that visualizes Ngrok tunnel activity in real time. Pair this with Prometheus alerts to notify you of suspicious behavior.

    Access Control: Use Ngrok’s built-in authentication features, or integrate it with tools like OAuth2 Proxy. This ensures only authorized users can access your tunnels.

    ⚠️ Security Note: Avoid hardcoding sensitive credentials in your scripts or configurations. Use environment variables or secret management tools like HashiCorp Vault.

    Network Segmentation: Isolate services exposed via Ngrok from the rest of your homelab. For example, use VLANs or firewall rules to restrict access to sensitive systems.

    Also, consider using reverse proxies like Traefik or Nginx to add an extra layer of security to your exposed services. These tools can handle SSL termination, authentication, and rate limiting, making your setup more resilient to attacks.

    Best Practices for Homelab Security

    Securing your homelab isn’t just about stopping Ngrok tunnels—it’s about adopting a complete approach to security. Here are some best practices to keep in mind:

    Regular Audits: Periodically review your homelab for vulnerabilities. Check for outdated software, misconfigurations, and unused services.

    For example, use tools like Lynis or OpenVAS to scan your systems for security issues. These tools can identify weak passwords, missing patches, and other common vulnerabilities.

    Network Segmentation: Divide your homelab into isolated segments to limit the impact of a potential breach. For example, keep your development environment separate from your personal devices.

    Stay Informed: Follow security blogs, forums, and mailing lists to stay updated on emerging threats and best practices. Knowledge is your best defense.

    💡 Pro Tip: Subscribe to Ngrok’s release notes to stay informed about security updates and new features.

    Finally, consider implementing a zero-trust model in your homelab. This involves verifying every connection and user, even those within your network. While this may seem excessive for a homelab, it’s an excellent way to practice advanced security techniques.

    Advanced Ngrok Security Configurations

    For users who want to take their Ngrok security to the next level, advanced configurations can provide additional layers of protection. Here are some options to consider:

    Custom Domains: Use a custom domain for your Ngrok tunnels to make them less predictable. This also allows you to apply stricter DNS-based security policies.

    Rate Limiting: Configure rate limits to prevent abuse of your tunnels. Ngrok supports rate limiting through its API, allowing you to restrict the number of requests per second.

    {
        "rate_limit": {
            "requests_per_second": 10
        }
    }

    Webhook Validation: If you’re using Ngrok to test webhooks, validate incoming requests to ensure they originate from trusted sources. This can be done by verifying HMAC signatures or using token-based authentication.

    💡 Pro Tip: Combine Ngrok with a Web Application Firewall (WAF) for additional protection against common web attacks like SQL injection and XSS.
    🛠️ Recommended Resources:

    Tools and books mentioned in (or relevant to) this article:

    main points

    • Ngrok is a powerful tool, but its convenience comes with security risks.
    • Apply enterprise-grade practices like least privilege, monitoring, and automation to manage tunnels effectively.
    • Use tools like cron jobs or systemd to automate tunnel termination.
    • Adopt open-source alternatives for monitoring and alerts in your homelab.
    • Regularly audit your homelab and stay informed about emerging threats.
    • Consider advanced configurations like custom domains, rate limiting, and webhook validation for enhanced security.

    Have a story about securing your homelab or a Ngrok horror story? I’d love to hear it—drop a comment or ping me on Twitter. Next week, we’ll explore securing self-hosted services with reverse proxies. Stay tuned!

    Related Reading

    Get daily AI-powered market intelligence. Join Alpha Signal — free market briefs, security alerts, and dev tool recommendations.
    📋 Disclosure: Some links in this article are affiliate links. If you purchase through these links, I earn a small commission at no extra cost to you. I only recommend products I’ve personally used or thoroughly evaluated. This helps support orthogonal.info and keeps the content free.

    FAQ

    Are Ngrok tunnels a security risk?

    Yes, if mismanaged. Ngrok creates a public URL that routes directly to your local service — bypassing your firewall entirely. Anyone with the URL can access the service. Without authentication, this is equivalent to opening a port to the internet with no access control. The risk compounds when tunnels are left running after testing.

    How do I detect unauthorized Ngrok tunnels on my network?

    Monitor outbound connections to Ngrok's infrastructure (*.ngrok.io, *.ngrok-free.app). Use your firewall's DNS logs or a Pi-hole to detect these domains. On individual machines, check for the ngrok process: ps aux | grep ngrok or ss -tlnp | grep ngrok. Enterprise users can block Ngrok at the DNS or firewall level.

    What should I use instead of Ngrok?

    For homelabs: Cloudflare Tunnel (free, zero open ports, access policies) or Tailscale Funnel. For development: SSH tunnels (ssh -R) are ephemeral and encrypted. For production: a proper reverse proxy (Nginx/Caddy) behind a VPN or Cloudflare Access. Each option provides authentication that Ngrok's free tier lacks.

    References

  • Free VPN: Cloudflare Tunnel & WARP Guide (2026)

    Free VPN: Cloudflare Tunnel & WARP Guide (2026)

    TL;DR: Cloudflare offers two free VPN solutions: WARP (consumer privacy VPN using WireGuard) and Cloudflare Tunnel + Zero Trust (self-hosted VPN replacement for accessing your home network). This guide covers both approaches step-by-step, with Docker Compose configs, split-tunnel setup, and security hardening. Zero Trust is free for up to 50 users — enough for any homelab or small team.

    Quick Answer: You can set up a completely free VPN using Cloudflare Tunnel and WARP. This guide covers installing cloudflared on your server, creating a tunnel, configuring DNS routes, and connecting clients — all using Cloudflare’s free tier with no bandwidth limits.

    Why Build Your Own VPN in 2026?

    Commercial VPN providers make bold promises about privacy, but their centralized architecture creates a fundamental trust problem. You’re routing all your traffic through servers you don’t control, operated by companies whose revenue model depends on subscriber volume — not security audits. ExpressVPN, NordVPN, and Surfshark have all faced scrutiny over logging practices, jurisdiction shopping, and opaque ownership structures.

    Cloudflare offers a different model. Instead of renting someone else’s VPN, you build your own using Cloudflare’s global Anycast network (330+ data centers in 120+ countries) as the transport layer. The result is a VPN that’s faster than most commercial alternatives, costs nothing, and gives you full control over access policies.

    There are two distinct approaches, and you might want both:

    • Cloudflare WARP — A consumer VPN app that encrypts your device traffic using WireGuard. Install, toggle on, done. Best for: browsing privacy on public Wi-Fi.
    • Cloudflare Tunnel + Zero Trust — A self-hosted VPN replacement that lets you access your home network (NAS, Proxmox, Pi-hole, Docker services) from anywhere without opening a single firewall port. Best for: homelabbers, remote workers, small teams.

    Part 1: Cloudflare WARP — The 5-Minute Privacy VPN

    What WARP Actually Does

    WARP is built on the WireGuard protocol — the same modern, lightweight VPN protocol that replaced IPSec and OpenVPN in most serious deployments. When you enable WARP, your device establishes an encrypted tunnel to the nearest Cloudflare data center. From there, your traffic exits onto the internet through Cloudflare’s network.

    Key technical details:

    • Protocol: WireGuard (via Cloudflare’s BoringTun implementation in Rust)
    • DNS: Queries routed through 1.1.1.1 (Cloudflare’s privacy-first DNS resolver, audited by KPMG)
    • Encryption: ChaCha20-Poly1305 for data, Curve25519 for key exchange
    • Latency impact: Typically 1-5ms added (vs. 20-50ms for most commercial VPNs) because traffic routes to the nearest Anycast PoP
    • No IP selection: WARP doesn’t let you choose exit countries — it’s a privacy tool, not a geo-unblocking tool

    Installation

    WARP runs on every major platform through the 1.1.1.1 app:

    Platform Install Method
    Windows one.one.one.one → Download
    macOS one.one.one.one → Download
    iOS App Store → search “1.1.1.1”
    Android Play Store → search “1.1.1.1”
    Linux curl -fsSL https://pkg.cloudflare.com/cloudflare-main.gpg | sudo tee /usr/share/keyrings/cloudflare-archive-keyring.gpg && echo "deb [signed-by=/usr/share/keyrings/cloudflare-archive-keyring.gpg] https://pkg.cloudflare.com/cloudflared $(lsb_release -cs) main" | sudo tee /etc/apt/sources.list.d/cloudflared.list && sudo apt update && sudo apt install cloudflare-warp

    After installing, launch the app and toggle WARP on. That’s it. Your DNS queries now go through 1.1.1.1 and your traffic is encrypted to Cloudflare’s edge.

    WARP vs. WARP+ vs. Zero Trust

    Feature WARP (Free) WARP+ ($) Zero Trust WARP
    Price $0 ~$5/month Free (50 users)
    Encryption WireGuard WireGuard WireGuard
    Speed optimization Standard routing Argo Smart Routing Standard routing
    Private network access No No Yes
    Access policies No No Full ZTNA
    DNS filtering No No Gateway policies

    For most people, free WARP is sufficient for everyday privacy. If you need remote access to your homelab, keep reading — Part 2 is where it gets interesting.

    Part 2: Cloudflare Tunnel + Zero Trust — The Self-Hosted VPN Replacement

    This is the setup that replaces WireGuard, OpenVPN, or Tailscale for accessing your home network. The architecture is elegant: a lightweight daemon called cloudflared runs inside your network and maintains an outbound-only encrypted tunnel to Cloudflare. Remote clients connect through Cloudflare’s network using the WARP client. No inbound ports. No dynamic DNS. No exposed IP address.

    Architecture Overview

    ┌─────────────────┐         ┌──────────────────────┐         ┌─────────────────┐
    │  Remote Device  │         │   Cloudflare Edge    │         │  Home Network   │
    │  (WARP Client)  │◄───────►│   330+ PoPs globally │◄───────►│  (cloudflared)  │
    │                 │  WireGuard│                      │ Outbound │                 │
    │  Phone/Laptop   │  Tunnel  │  Zero Trust Policies │  Tunnel  │  NAS/Docker/LAN │
    └─────────────────┘         └──────────────────────┘         └─────────────────┘
    

    Prerequisites

    • A Cloudflare account (free tier works)
    • A domain name with DNS managed by Cloudflare (required for tunnel management)
    • A server on your home network — any Linux box, Raspberry Pi, Synology NAS, or even a Docker container on TrueNAS
    • Docker + Docker Compose (recommended) or bare-metal cloudflared installation

    Step 1: Create a Tunnel in the Zero Trust Dashboard

    1. Go to one.dash.cloudflare.com → Networks → Tunnels
    2. Click Create a tunnel
    3. Select Cloudflared as the connector type
    4. Name your tunnel (e.g., homelab-tunnel)
    5. Copy the tunnel token — you’ll need this for the Docker config

    Step 2: Deploy cloudflared with Docker Compose

    Create a docker-compose.yml on your home server:

    version: "3.8"
    services:
      cloudflared:
        image: cloudflare/cloudflared:latest
        container_name: cloudflared-tunnel
        restart: unless-stopped
        command: tunnel --no-autoupdate run --token ${TUNNEL_TOKEN}
        environment:
          - TUNNEL_TOKEN=${TUNNEL_TOKEN}
        network_mode: host   # Required for private network routing
    
      # Example: expose a local service
      whoami:
        image: traefik/whoami
        container_name: whoami
        ports:
          - "8080:80"

    Create a .env file alongside it:

    TUNNEL_TOKEN=eyJhIjoiYWJj...your-token-here

    Start the tunnel:

    docker compose up -d
    docker logs cloudflared-tunnel  # Should show "Connection registered"

    Critical note: Use network_mode: host if you want to route traffic to your entire LAN subnet (192.168.x.0/24). Without it, cloudflared can only reach services within the Docker network.

    Step 3: Expose Services via Public Hostnames

    Back in the Zero Trust dashboard, under your tunnel’s Public Hostnames tab:

    1. Click Add a public hostname
    2. Set subdomain: nas, domain: yourdomain.com
    3. Service type: HTTP, URL: localhost:5000 (or wherever your service runs)
    4. Save

    Cloudflare automatically creates a DNS record. Your NAS is now accessible at https://nas.yourdomain.com — with automatic SSL, DDoS protection, and Cloudflare WAF.

    Step 4: Enable Private Network Routing (Full VPN Mode)

    This is what turns a simple tunnel into a full VPN replacement. Instead of exposing individual services, you route an entire IP subnet through the tunnel.

    1. In Zero Trust dashboard → Networks → Tunnels → your tunnel → Private Networks
    2. Add your LAN CIDR: 192.168.1.0/24 (adjust to your subnet)
    3. Go to Settings → WARP Client → Split Tunnels
    4. Switch to Include mode and add 192.168.1.0/24

    Now, any device running the WARP client (enrolled in your Zero Trust org) can access 192.168.1.x addresses as if they were on your home network. SSH into your server, access your NAS web UI, reach your Pi-hole dashboard — all without port forwarding.

    Step 5: Enroll Client Devices

    1. Install the 1.1.1.1 / WARP app on your phone or laptop
    2. Go to Settings → Account → Login to Cloudflare Zero Trust
    3. Enter your team name (set during Zero Trust setup)
    4. Authenticate with the method you configured (email OTP, Google SSO, GitHub, etc.)
    5. Enable Gateway with WARP mode

    Test it: connect to mobile data (not your home Wi-Fi) and try accessing a LAN IP like http://192.168.1.1. If the router admin page loads, your VPN is working.

    Step 6: Lock It Down — Zero Trust Access Policies

    The “Zero Trust” part of this setup is what separates it from a traditional VPN. Instead of “anyone with the VPN key gets full network access,” you define granular policies:

    Zero Trust Dashboard → Access → Applications → Add an Application
    
    Application type: Self-hosted
    Application domain: nas.yourdomain.com
    
    Policy: Allow
    Include: Emails ending in @yourdomain.com
    Require: Country equals United States (optional geo-fence)
    
    Session duration: 24 hours

    You can create different policies per service. Your Proxmox admin panel might require hardware key (FIDO2) authentication, while your Jellyfin media server only needs email OTP. This is Zero Trust Network Access (ZTNA) — the same architecture that Google BeyondCorp and Microsoft Entra use internally.

    Cloudflare Tunnel vs. Alternatives: Honest Comparison

    Feature Cloudflare Tunnel WireGuard Tailscale OpenVPN
    Price Free (50 users) Free Free (100 devices) Free
    Open ports required None 1 UDP port None 1 UDP/TCP port
    Setup complexity Medium Medium-High Low High
    Works behind CG-NAT Yes Needs port forward Yes Needs port forward
    Access control Full ZTNA policies Key-based only ACLs + SSO Cert-based
    DDoS protection Yes (Cloudflare) No No No
    SSL/TLS termination Automatic N/A N/A Manual
    Trust model Trust Cloudflare Self-hosted Trust Tailscale Self-hosted
    Best for Web services + LAN Pure privacy Mesh networking Enterprise legacy

    The honest tradeoff: Cloudflare Tunnel routes your traffic through Cloudflare’s infrastructure. If you fundamentally distrust any third party touching your packets, self-hosted WireGuard is the purist choice. But for most homelabbers, the convenience of zero open ports + free DDoS protection + granular access policies makes Cloudflare Tunnel the pragmatic winner.

    Advanced: Multi-Service Docker Stack

    Here’s a production-grade Docker Compose that exposes multiple services through a single tunnel:

    version: "3.8"
    
    services:
      cloudflared:
        image: cloudflare/cloudflared:latest
        container_name: cloudflared
        restart: unless-stopped
        command: tunnel --no-autoupdate run --token ${TUNNEL_TOKEN}
        environment:
          - TUNNEL_TOKEN=${TUNNEL_TOKEN}
        networks:
          - tunnel
        depends_on:
          - nginx
    
      nginx:
        image: nginx:alpine
        container_name: nginx-proxy
        volumes:
          - ./nginx.conf:/etc/nginx/nginx.conf:ro
        networks:
          - tunnel
    
      # Add your services here — they just need to be on the 'tunnel' network
      # Configure public hostnames in the CF dashboard to point to nginx
    
    networks:
      tunnel:
        name: cf-tunnel

    Map each service to a subdomain in the Zero Trust dashboard: grafana.yourdomain.com → http://nginx:3000, code.yourdomain.com → http://nginx:8443, etc.

    Troubleshooting Common Issues

    Tunnel shows “Disconnected” in the dashboard

    • Check Docker logs: docker logs cloudflared-tunnel
    • Verify your token hasn’t been rotated
    • Ensure outbound HTTPS (port 443) isn’t blocked by your router/ISP
    • If behind a corporate firewall, cloudflared also supports HTTP/2 over port 7844

    Private network routing doesn’t work

    • Confirm network_mode: host in Docker Compose (or use macvlan)
    • Check that the CIDR in “Private Networks” matches your actual subnet
    • Verify Split Tunnels are set to Include mode (not Exclude)
    • On the client, run warp-cli settings to verify the private routes are active

    WARP client won’t enroll

    • Double-check your team name in Zero Trust → Settings → Custom Pages
    • Ensure you’ve created a Device enrollment policy under Settings → WARP Client → Device enrollment permissions
    • Allow email domains or specific emails that can enroll

    Security Hardening Checklist

    • ☐ Enable Require Gateway in device enrollment — forces all enrolled devices through Cloudflare Gateway for DNS filtering
    • ☐ Set session duration to 24h or less for sensitive services
    • ☐ Require FIDO2/hardware keys for admin panels (Proxmox, router, etc.)
    • ☐ Enable device posture checks: require screen lock, OS version, disk encryption
    • ☐ Use Service Tokens (not user auth) for machine-to-machine tunnel access
    • ☐ Monitor Access audit logs: Zero Trust → Logs → Access
    • ☐ Never put your tunnel token in a public Git repository — use .env files and .gitignore
    • ☐ Rotate tunnel tokens periodically via the dashboard

    Recommended Hardware

    Running Cloudflare Tunnel on a dedicated device keeps your main machine clean. A mini PC is perfect for always-on tunnel hosting — low power draw, fanless, and small enough to mount behind a monitor. For Docker-based setups, a 1TB NVMe SSD gives plenty of room for containers and logs. If you're running Plex or media behind Cloudflare, check out our TrueNAS Plex setup guide.

    FAQ

    Is Cloudflare Tunnel really free?

    Yes. Cloudflare Zero Trust offers a free plan that includes tunnels, access policies, and WARP client enrollment for up to 50 users. There are no bandwidth limits on the free tier. Paid plans (starting at $7/user/month) add features like logpush, extended session management, and dedicated egress IPs.

    Can Cloudflare see my traffic?

    Cloudflare terminates TLS at their edge, so they technically could inspect unencrypted HTTP traffic passing through the tunnel. For HTTPS services, end-to-end encryption between your browser and origin server means Cloudflare sees metadata (domain, timing) but not content. If this is a concern, use WireGuard for a fully self-hosted solution where no third party touches your packets.

    Does this work with Starlink / CG-NAT / mobile hotspots?

    Yes — this is one of Cloudflare Tunnel’s biggest advantages. Since the tunnel is outbound-only, it works behind any NAT, including carrier-grade NAT (CG-NAT) used by Starlink, T-Mobile Home Internet, and most 4G/5G connections. No port forwarding needed.

    Can I use this for site-to-site VPN?

    Yes, using WARP Connector (currently in beta). Install cloudflared with WARP Connector mode on a device at each site, and Cloudflare routes traffic between subnets. This replaces traditional IPSec site-to-site tunnels.

    Cloudflare Tunnel vs. Tailscale — which should I use?

    Use Tailscale if your primary need is device-to-device mesh networking (see also our guide on home network segmentation with OPNsense) (accessing any device from any other device). Use Cloudflare Tunnel if you want to expose web services with automatic HTTPS and DDoS protection, or if you need granular ZTNA policies. Many homelabbers use both: Tailscale for device mesh, Cloudflare Tunnel for public-facing services.

    References

Also by us: StartCaaS — AI Company OS · Hype2You — AI Tech Trends