Why Algorithmic Trading is a Game-Changer for Engineers
Picture this: you’re sipping coffee while your custom trading bot executes hundreds of trades in milliseconds, identifying opportunities and managing risks far better than any human could. Sounds like a dream, right? Yet, for engineers, this is well within reach. Algorithmic trading merges the precision of mathematics, the elegance of code, and the unpredictability of financial markets into one fascinating domain.
But it’s not all smooth sailing. I’ve been there—watching a bot I meticulously coded drain my portfolio overnight, all because of a single logic error. While the potential rewards are immense, the risks are equally daunting. The key is a solid foundation, a structured approach, and a clear understanding of the tools and concepts at play.
In this guide, I’ll walk you through the essentials of algorithmic trading, covering everything from core principles to advanced strategies, with plenty of code examples and practical advice along the way. Whether you’re a seasoned engineer or a curious newcomer, you’ll find actionable insights here.
Core Principles of Algorithmic Trading
Before you write a single line of code, it’s crucial to grasp the core principles that underpin algorithmic trading. These principles are the building blocks for any successful strategy.
Understanding Financial Data
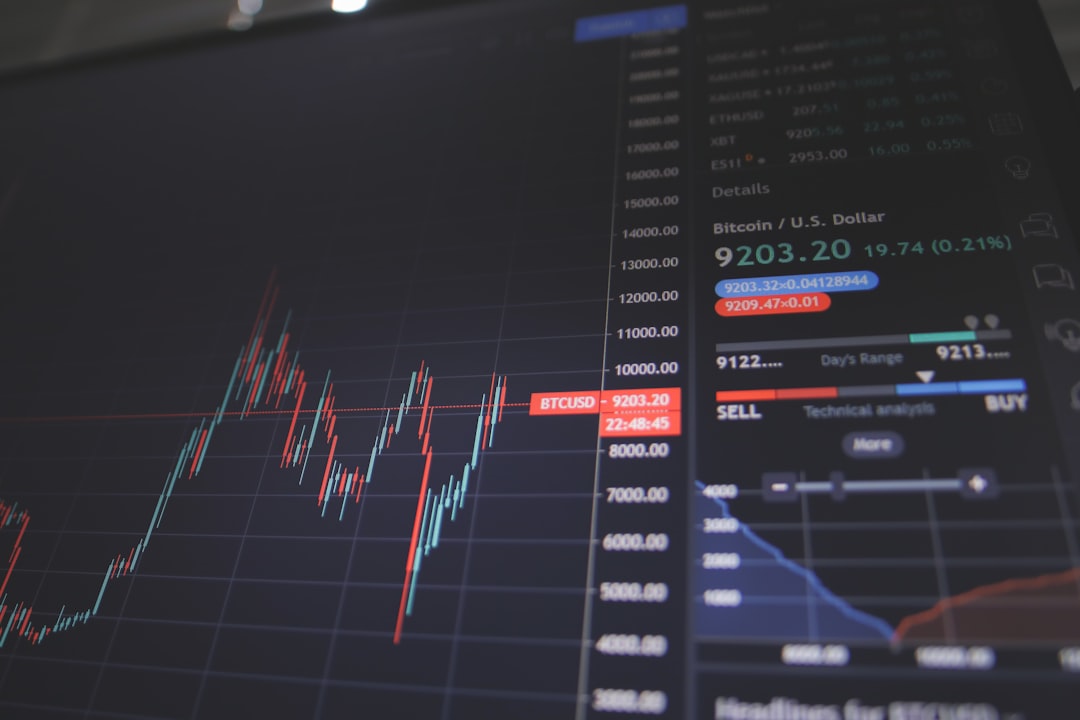
At the heart of algorithmic trading lies financial data, usually represented as time series data. This data consists of sequentially ordered data points, such as stock prices or exchange rates, indexed by time.
Key components of financial data include:
- Open, High, Low, Close (OHLC): Standard metrics for candlestick data, representing the day’s opening price, highest price, lowest price, and closing price.
- Volume: The number of shares or contracts traded during a period. High volume often indicates strong trends.
- Indicators: Derived metrics like moving averages, Relative Strength Index (RSI), Bollinger Bands, or MACD (Moving Average Convergence Divergence).
Financial data can be messy, with missing values or outliers that can distort your algorithms. Engineers need to preprocess and clean this data using statistical methods or libraries like pandas in Python.
Risk vs. Reward
Every trade involves a balance between risk and reward. Engineers must develop a keen understanding of this dynamic to ensure their strategies are both profitable and sustainable.
You’ll frequently encounter metrics like the Sharpe Ratio, which evaluates the risk-adjusted return of a strategy:
# Python code to calculate Sharpe Ratio
import numpy as np

def sharpe_ratio(returns, risk_free_rate=0.01):
    excess_returns = returns - risk_free_rate
    return np.mean(excess_returns) / np.std(excess_returns)
A higher Sharpe Ratio indicates better performance relative to risk. It’s a cornerstone metric for evaluating strategies.
Beyond Sharpe Ratio, engineers also consider metrics like Sortino Ratio (which accounts for downside risk) and Max Drawdown (the maximum loss from peak to trough during a period).
Statistical Foundations
Algorithmic trading heavily relies on statistical analysis. Here are three key concepts:
- Mean: The average value of a dataset, useful for identifying trends.
- Standard Deviation: Measures data variability, crucial for assessing risk. A higher standard deviation means greater volatility.
- Correlation: Indicates relationships between different assets. For example, if two stocks have a high positive correlation, they tend to move in the same direction.
pandas and NumPy for efficient statistical analysis in Python. Python’s statsmodels library also provides robust statistical tools for regression and hypothesis testing.How to Build an Algorithmic Trading System
An algorithmic trading system typically consists of three main components: data acquisition, strategy development, and execution. Let’s explore each in detail.
1. Data Acquisition
Reliable data is the foundation of any successful trading strategy. Without accurate data, even the most sophisticated algorithms will fail.
Here are common ways to acquire data:
- APIs: Platforms like Alpha Vantage, Interactive Brokers, and Alpaca offer APIs for real-time and historical data. For cryptocurrency trading, APIs like Binance and Coinbase are popular choices.
- Web Scraping: Useful for gathering less-structured data, such as news sentiment or social media trends. Tools like
BeautifulSouporScrapycan help extract this data efficiently. - Database Integration: For large-scale operations, consider storing data in a database like PostgreSQL, MongoDB, or even cloud-based solutions like Amazon AWS or Google BigQuery.
2. Backtesting
Backtesting involves evaluating your strategy using historical data. It helps you understand how your algorithm would have performed in the past, which is a good indicator of future performance.
Here’s an example of backtesting a simple moving average strategy using the backtrader library:
import backtrader as bt

class SmaStrategy(bt.Strategy):
    def __init__(self):
        self.sma = bt.indicators.SimpleMovingAverage(self.data, period=20)

    def next(self):
        if self.data.close[0] < self.sma[0]:
            self.buy(size=10)  # Buy signal
        elif self.data.close[0] > self.sma[0]:
            self.sell(size=10)  # Sell signal

cerebro = bt.Cerebro()
data = bt.feeds.YahooFinanceData(dataname='AAPL', fromdate='2022-01-01', todate='2023-01-01')
cerebro.adddata(data)
cerebro.addstrategy(SmaStrategy)
cerebro.run()
cerebro.plot()
Backtesting isn’t perfect, though. It assumes perfect execution and doesn’t account for slippage or market impact. Engineers can use advanced simulation tools or integrate real-world trading conditions for more accurate results.
3. Execution
Execution involves connecting your bot to a broker’s API to place trades. Popular brokers like Interactive Brokers and Alpaca offer robust APIs.
Here’s an example of placing a market order using Alpaca’s API:
from alpaca_trade_api import REST

api = REST('your_api_key', 'your_secret_key', base_url='https://paper-api.alpaca.markets')

# Place a buy order
api.submit_order(
    symbol='AAPL',
    qty=10,
    side='buy',
    type='market',
    time_in_force='gtc'
)
Advanced Strategies and Common Pitfalls
Once you’ve mastered the basics, you can explore more advanced strategies and learn to avoid common pitfalls.
Mean Reversion
Mean reversion assumes that prices will revert to their average over time. For instance, if a stock’s price is significantly below its historical average, it might be undervalued. Engineers can use statistical tools to identify mean-reverting assets.
Momentum Trading
Momentum strategies capitalize on continuing trends. If a stock’s price is steadily increasing, the strategy might suggest buying to ride the trend. Momentum traders often use indicators like RSI or MACD to identify strong trends.
Machine Learning
Machine learning can predict price movements based on historical data. Techniques like regression, classification, and clustering can uncover patterns that traditional methods might miss. However, be cautious of overfitting, where your model performs well on historical data but fails on new data.
Popular libraries for machine learning include scikit-learn, TensorFlow, and PyTorch. Engineers can also explore reinforcement learning for dynamic strategy optimization.
Common Pitfalls
Here are some challenges you might encounter:
- Overfitting: Avoid creating strategies too tailored to historical data.
- Data Snooping: Using future data in backtests invalidates results.
- Slippage: Account for execution price differences in real markets.
- Latency: Delays in execution can impact profitability, especially for high-frequency trading.
Key Takeaways
- Algorithmic trading combines engineering, data science, and finance to create scalable trading strategies.
- Understand foundational concepts like time series data, statistical metrics, and risk management.
- Backtesting is essential but not foolproof—account for real-world factors like slippage.
- Start simple with strategies like mean reversion before exploring advanced techniques like machine learning.
- Test extensively in paper trading environments to ensure robustness before going live.
Have you tried building a trading bot? Share your experiences and lessons learned. Let’s collaborate and elevate our trading strategies together!
Tools and books mentioned in (or relevant to) this article:
- Options, Futures, and Other Derivatives (Hull) — The bible of derivatives ($70-90)
- Python for Data Analysis (McKinney) — Quantitative finance with Python ($50-60)
- Algorithmic Trading (Ernest Chan) — Practical strategies ($45)
📋 Disclosure: Some links in this article are affiliate links. If you purchase through these links, I earn a small commission at no extra cost to you. I only recommend products I have personally used or thoroughly evaluated.
📚 Related Articles
- Risk Management & Position Sizing: An Engineer’s Guide to Trading
- The Definitive Homelab Hardware Guide: Build Your Self-Hosting Dream in 2026
- Advanced Options Strategies for Engineers: A Practical Guide
📊 Free AI Market Intelligence
Join Alpha Signal — AI-powered market research delivered daily. Narrative detection, geopolitical risk scoring, sector rotation analysis.
Pro with stock conviction scores: $5/mo